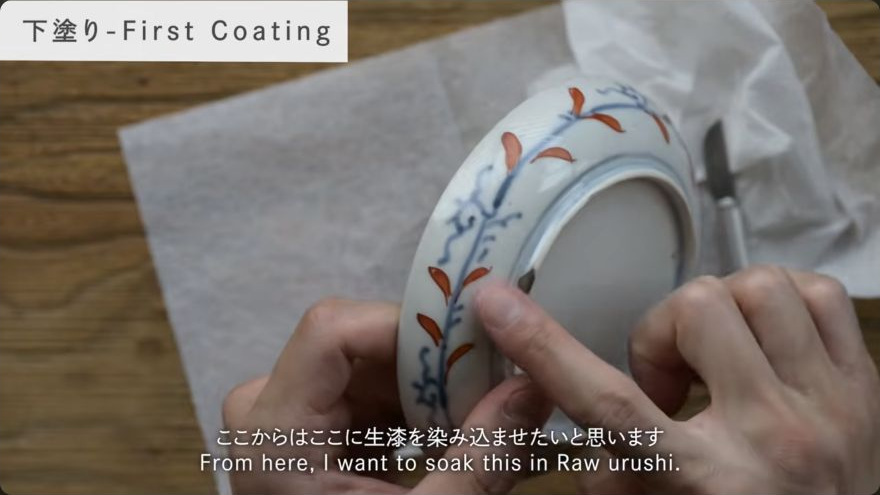
Method 02

Kokuso and sabi

Filling, shaping, and the first real ground.

Kokuso-and-sabi is the filling and ground-building stage of lacquer repair and surface preparation, sitting between a clean bare substrate (kiji or exposed ceramic cross-section) and the first middle coats (naka-nuri). Kokuso (wood-dust-and-lacquer filler) restores lost volume in chips and gaps, while sabi (tonoko-and-lacquer putty) levels the surface to a smooth, uniform plane ready for subsequent lacquer coats. The technique demands patience in mixing, a steady hand in application, and disciplined curing in a humidity-controlled environment before any trimming or sealing can proceed.

Before this: A clean, dry substrate with the loss or area to be filled clearly identified · Access to a furo (humidity-controlled curing cabinet) or equivalent curing space · The substrate surface free of oils, salts, and dust that would prevent lacquer adhesion · Masking material (tape or masking fluid) ready to protect adjacent surfaces

Read the handbook chapter
Safety gate

This procedure involves direct contact with uncured urushi, which is a potent skin sensitiser with a delayed reaction. Work gloved, keep it off skin, and read the safety chapter before starting. Read Safety First before you begin.
Raw urushi (ki-urushi) is a potent skin sensitiser. Contact can cause a delayed urushiol reaction (typically 24–72 hours after exposure) ranging from mild redness to severe blistering dermatitis. The reaction is cumulative: once sensitised, even brief contact with trace amounts triggers a response. Wear nitrile or latex gloves when mixing and applying any lacquer-containing paste, and avoid skin c
The furo environment (high humidity, mild warmth) accelerates lacquer curing but also increases the risk of skin contact with tacky surfaces. Handle cured pieces with clean hands or gloves, and do not press bare skin against a surface that may still be partially cured.
When trimming cured filler with a cutter blade or rotary cutter, the blade can slip into the substrate. Hold the blade at a low angle, work in thin passes, and keep fingers behind the cutting edge.

Tools

  • hera (spatula)— For mixing the clay-lacquer paste and applying it to the substrate; shape may be modified to fit vessel curves
  • Cutter blade or rotary cutter— For trimming cured filler flush with the surrounding surface
  • Cotton swab or small hake (lacquer brush)— For applying the thin initial bonding coat of lacquer
  • Tissue or cloth— For wiping excess lacquer from the bonding coat and absorbing surplus water from clay mixes
  • Masking tape or watercolor masking fluid— To protect adjacent glaze, lacquer, or clay surfaces from filler and lacquer stains
  • Furo (humidity-controlled curing cabinet)— Required for proper curing of lacquer-bound fillers; provides the 70–80 % RH and mild warmth that raw urushi needs to polymerise

Materials

  • ki-urushi (raw unrefined lacquer)— Primary binder for both kokuso and sabi mixes; also used for the initial bonding coat
  • tonoko (fine polishing-clay powder)— The fine component of the sabi ground; mixed with water and lacquer to a smooth paste
  • jinoko (fired-clay powder)— Coarser clay used for deeper structural fills before the finer tonoko layer
  • kokuso (wood-dust fiber)— Short wood or plant fiber added to the tonoko-lacquer mix to give the kokuso filler body and reduce shrinkage
  • mugi-urushi (lacquer-and-wheat-flour adhesive)— Used for the sealing coat over the cured filler to close its porosity
  • Water— Used to bring the clay powders to a workable paste before lacquer is added; not used in all methods
  • Ajiao (animal glue) and hofun (oyster-shell powder)— Korean sabi ground binder and aggregate; an alternative system to the Japanese tonoko-ki-urushi mix

The working sequence

7 steps, each traceable.

Each illustration is a frame taken from the source video at the moment cited, and checked against the step it accompanies. Where no frame passed that check, the step runs without one rather than carrying a misleading picture.

A method merged from several workshops is not a settled standard. 2 of the 6 workshops listed are not cited by any step. 4 further questions the sources leave unanswered are set out at the end.

01 Source · 1:35
No verified frame Open the source at the cited moment.

Clean and prepare the substrate

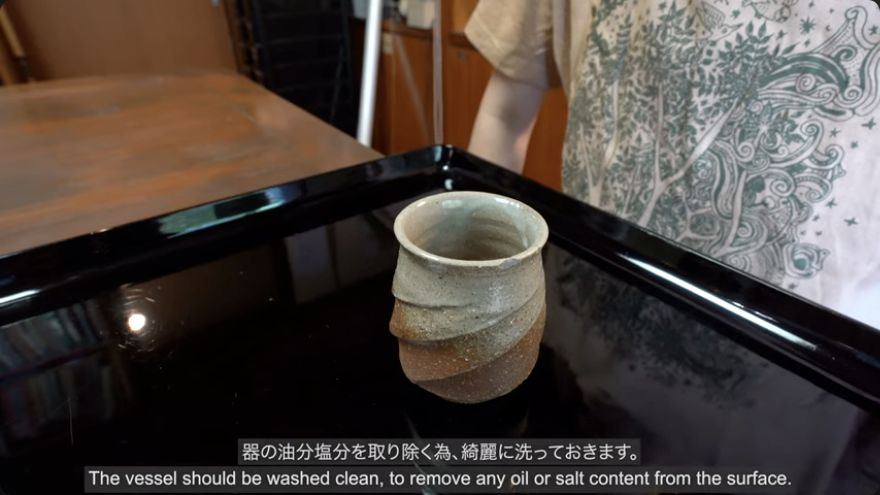
Wash the area to be filled thoroughly to remove all oils, salts, and dust. For ceramic, this means a full wash of the cross-section and surrounding glaze; for wood, ensure the kiji is free of sawdust and handling residue. If the substrate is a board or panel, sand the surface and all edges to a flat, even plane before any lacquer is applied. Mask the surrounding area with tape or a thin film of watercolor masking fluid, keeping the mask close to the loss edge but not covering any thin glaze losses or the gap itself. The surface must be completely clean and dry before the next step.

When it is rightThe surface is free of visible contaminants, the masked area is clearly defined, and the loss or gap is fully exposed and accessible.

When it goes wrongResidual oils, salts, or dust will cause the lacquer to peel or fail to bond. If the surface feels greasy or shows a white film after washing, re-wash and dry completely before proceeding.

Workshops differ
  • The Korean tradition (HwihoCraft) emphasises sanding all four edges of a board before any ground is applied, treating edge preparation as a distinct and physically demanding task.
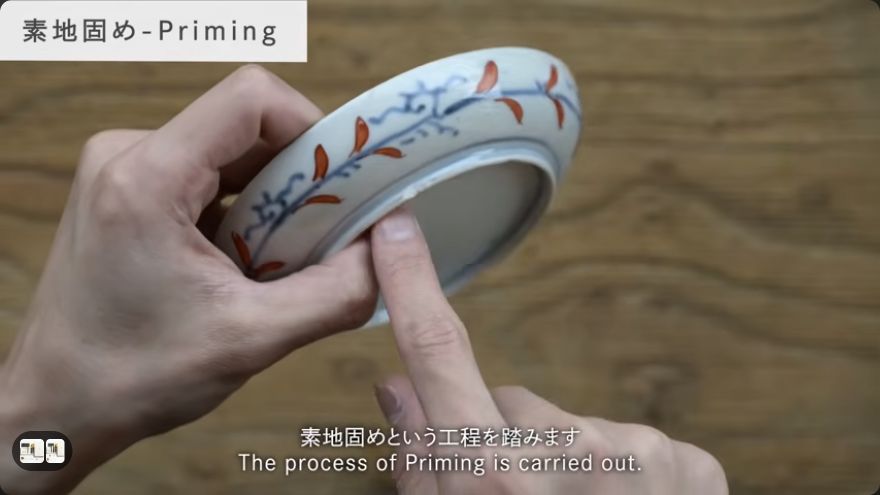
02 Source · 1:54
No verified frame Open the source at the cited moment.

Apply a bonding coat of ki-urushi

Using a cotton swab or a small hake, apply a thin, even film of ki-urushi directly onto the exposed cross-section or the area to be filled. The goal is a barely visible wet sheen, not a pooling coat. Immediately after application, press a folded piece of tissue gently over the surface to absorb the surplus, leaving only a thin residual film. This film acts as the adhesive layer that will bond the clay-lacquer filler to the substrate. Allow this coat to cure in the furo for two to three days, or until it is hard, non-tacky, and solid under the nail. If the lacquer remains tacky, extend the curing time rather than proceeding.

When it is rightThe lacquer film is hard, does not stick to a fingertip, and feels solid under the nail. The surface has a faint sheen but no visible pooling.

When it goes wrongApplying too much lacquer or wiping too aggressively removes the bonding film entirely, leaving a bare surface that will not accept the filler. If the coat is too thick and runs, thin it with a light tissue press and re-cure. If the surface is still tacky after the expected time, the furo humidity or temperature is insufficient; extend curing.

Workshops differ
  • Irahara Mitsumi applies the bonding coat with a cotton swab and wipes with tissue; chimahaga applies mugi-urushi directly from the tube and presses 2–3 times to thin the coat. Both achieve the same thin-film result.
  • The Korean practice (HwihoCraft) applies the first ki-urushi coat over the entire board surface, not just the loss area, and cures it in a chichang (curing room) for one day.
03 Source · 5:11
No verified frame Open the source at the cited moment.

Mix the kokuso or sabi filler

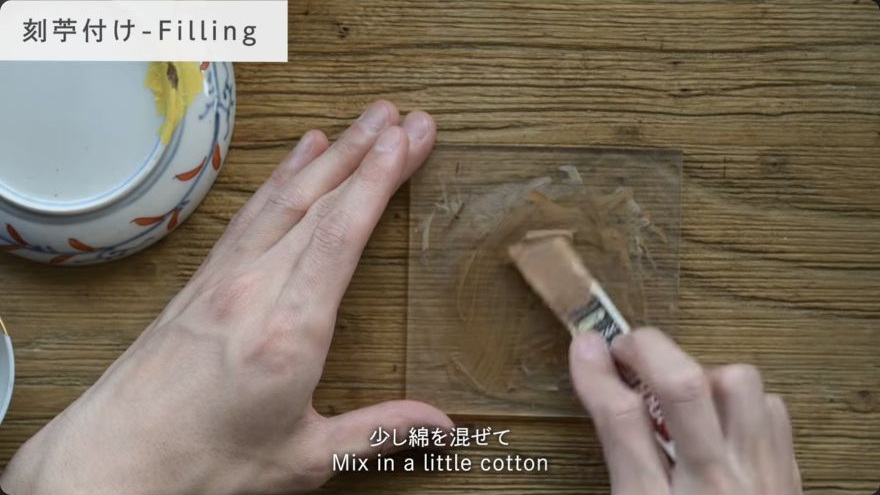
For a kokuso filler (structural, for deep losses): place tonoko in a small mixing dish and add a small amount of water to bring it to a smooth, non-gritty paste. If the paste is too wet, press it with tissue to absorb excess moisture. Add an equal volume of ki-urushi and mix thoroughly with a hera, scraping all lacquer from the spatula to avoid waste. Then add a small quantity of kokuso fiber, mixing until the surface shows a slight texture but is not fluffy or stringy. For a sabi ground (finer, for surface leveling): mix tonoko with water to a paste, add ki-urushi, and omit the fiber entirely. The finished paste should hold its shape when lifted with the hera but still be smooth enough to spread. Wrap any unused mix in plastic to prevent drying and to release trapped air bubbles. Work in small batches to maintain consistency.

When it is rightA smooth, consistent paste that holds its shape on the hera without slumping, with a slight surface texture if kokuso fiber is present. No lumps of dry clay, no free liquid pooling at the edges.

When it goes wrongToo much water makes the mixture weak and prone to cracking as it dries; too much lacquer makes it sticky and difficult to shape. If the kokuso fiber is over-added, the mix becomes fluffy and brittle. Remake the batch with less water or less fiber as needed.

Workshops differ
  • Dmitry Bykov mixes fine ceramic powder directly with ki-urushi and no water, adjusting to a semi-thick paste by adding more powder if the mix is too liquid. This water-free method is suited to building up volume in larger losses.
  • Irahara Mitsumi uses both jinoko (coarser) and tonoko (finer) in separate mixes, applying the coarser first for depth and the finer second for surface. The clay-to-lacquer ratio is described as 'a slightly smaller amount of ki-urushi' to the clay.
  • The Korean sabi ground (HwihoCraft) uses ajiao (animal glue) as the binder with hofun (oyster-shell powder) rather than ki-urushi and tonoko. The mix is stirred vigorously to a workable consistency and applied by spreading and scraping.
  • Lacquer ChengYan's comparative tests use a filler-to-lacquer ratio of 1:0.8 by volume, applied to a pre-coated oak board. This ratio is a useful reference point for the Japanese tonoko-ki-urushi mix.
04 Source · 5:11
No verified frame Open the source at the cited moment.

Apply the filler to the loss or ground area

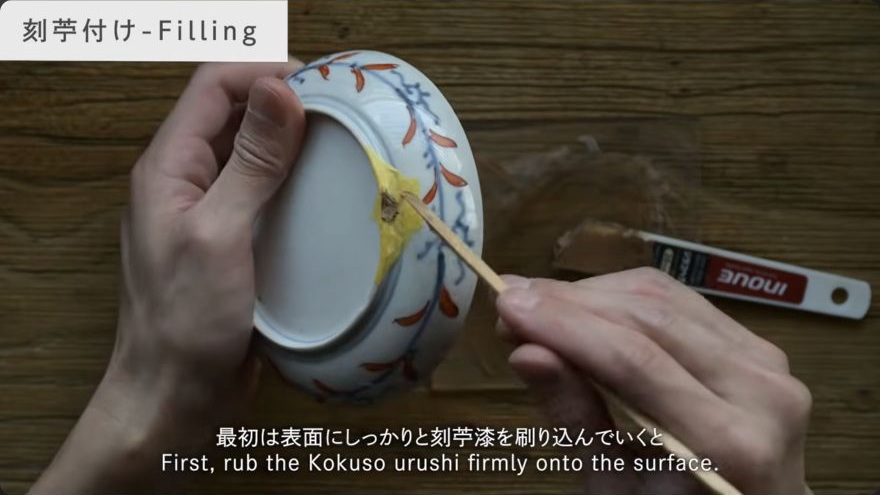
Using a hera, fingers, or a modified spatula that follows the curve of the vessel, press the filler firmly into the chip, gap, or ground area. For deep losses, work the material into the base with the fingertips to ensure all small voids are filled, then build up a mound slightly above the surrounding surface level to compensate for shrinkage during curing. For a sabi ground over a broad area, spread the paste thinly and scrape it off with the hera to achieve a flat, even layer; repeat the apply-and-scrape cycle to build up to the desired thickness. If the loss is large, a backing of adhesive tape can be placed on the interior surface to support the new material, ensuring the tape does not contact the sticky side of the lacquer mix. For long seams, apply the filler generously over the masked edge so it bridges the gap completely. Shape the surface smoothly with the hera, leaving it slightly proud of the final level.

When it is rightThe loss is filled flush or slightly proud of the surrounding surface, with no visible gaps, voids, or air pockets. The surface is smooth and continuous with the adjacent area. For a sabi ground, the layer is thin, even, and free of lumps or ridges.

When it goes wrongIf the filler is applied too thinly, it will shrink below the surface and leave a concave depression. If the backing for a large loss is not secure, the new material may detach during curing. If the sabi ground is applied too thickly or unevenly, it will be extremely difficult to sand flat later. Reapply filler to any low spots before curing.

Workshops differ
  • Dmitry Bykov applies the ceramic-lacquer mix directly with the fingers, rubbing it into the base, and uses a tape backing for larger missing fragments. This is a more tactile approach than the hera-based method.
  • The Korean practice (HwihoCraft) applies the sabi ground by spreading and then scraping off with a flat tool, repeating the cycle to build a uniform layer. The maker describes this as physically demanding for the forearms.
  • Irahara Mitsumi applies the coarser jinoko mix first, then the finer tonoko mix on top, using a spatula modified to fit the vessel's curve. This two-stage approach separates structural fill from surface leveling.
05 Source · 5:11
No verified frame Open the source at the cited moment.

Cure the filler in the furo

Place the filled piece in the furo (humidity-controlled curing cabinet) and allow the lacquer to polymerise. The curing time depends on the method and the thickness of the fill: a water-based clay-lacquer mix with a high water content may dry at room temperature within one day, while a lacquer-only mix or a thick kokuso fill requires two to three days in the furo, and larger builds may take several days to a week. Do not open the furo or handle the piece before the expected time has elapsed. After curing, test the filler by pressing a fingernail into the surface: it should be hard, non-tacky, and leave no mark. If the surface is still soft or tacky, return the piece to the furo and extend the curing period.

When it is rightThe filler is fully hard, does not stick to a fingertip, and feels solid under the nail. The surface is stable and will not deform under light pressure.

When it goes wrongIf the lacquer has not fully cured, the filler will remain tacky or soft, and any subsequent trimming or handling will damage it. The most common cause is insufficient humidity or temperature in the curing environment. Extend the furo time and re-test before proceeding.

Workshops differ
  • Irahara Mitsumi notes that a water-based clay mix dries at room temperature within one day due to the water content, without requiring a furo. This is a shorter, less controlled cure than the furo-based method.
  • Dmitry Bykov reports a curing time of several days to a week in a drying cabinet (furo), with the note that the material must be fully hardened before any adjustments are made.
  • The Korean practice (HwihoCraft) cures the first ki-urushi coat in a chichang (curing room) for one day.
06 Source · 10:12
No verified frame Open the source at the cited moment.

Trim and level the cured filler

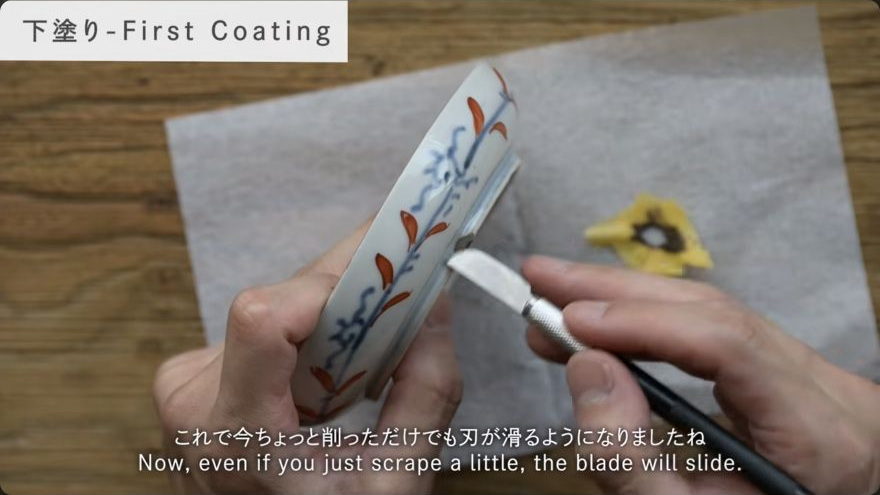
Remove the masking tape or lift the dried masking-fluid film with a knife, peeling it away to remove any excess filler that has spread onto the adjacent surface. Then take a cutter blade held flat against the surface and shave off the excess filler in thin, controlled passes. Work gently to avoid cutting into the substrate beneath. The goal is for the blade to slide over the surface without catching or resistance. Check the result by touch with eyes closed: the repaired area should be indistinguishable from the surrounding surface, with no step, ridge, or depression. If the surface is still concave, reapply a thin layer of filler, cure, and trim again. For curved vessels, a rotary cutter can be used to follow the contour and match the shape precisely.

When it is rightThe surface is flush and smooth; the cutter blade slides without resistance. By touch, the repair is indistinguishable from the surrounding area. The adjacent surfaces are clean, with no residue of filler.

When it goes wrongIf the blade catches, there is still excess filler; continue trimming in thin passes. If the surface is concave after trimming, the filler has shrunk below the surface; reapply and re-cure. If the masking film is removed before the filler has set, it may pull out some of the filler, leaving a ragged edge. If the film is too thick, it may be difficult to remove cleanly and may leave a residue line.

Workshops differ
  • Irahara Mitsumi uses a rotary cutter to trim the dried tonoko layer to match the vessel's curve, a tool better suited to concave surfaces than a flat blade.
  • Dmitry Bykov lifts the dried masking-fluid film with a knife to remove excess filler in one clean peel, leaving a sharp edge to the filled seam.
07 Source · 12:03
No verified frame Open the source at the cited moment.

Seal the filler surface

Mask the surrounding area again if it was not already protected. Apply a thin coat of mugi-urushi (or ki-urushi) directly over the cured and trimmed filler to seal its porous surface. Wait approximately five minutes; if the lacquer begins to dry and the surface looks dull, apply a small amount more. After about ten minutes, wipe off the excess with a tissue, pressing gently until no colour transfers to the tissue. This leaves a thin, even sealing film that closes the pores of the clay-lacquer filler and provides a stable base for the subsequent middle coats (naka-nuri). Cure the sealed surface in the furo for two to three days before proceeding to the next stage of the repair or the first naka-nuri coat.

When it is rightThe surface is sealed and smooth, with a faint sheen and no sticky residue. The tissue comes away clean, with no colour transfer. The filler is no longer porous or chalky to the touch.

When it goes wrongIf the lacquer stains the surrounding glaze or surface, the masking was inadequate; clean the stain immediately with a lacquer-thinning solvent if possible, or mask and re-seal in the next session. If the sealing coat is too thick, it may run or pool; thin it with a light tissue press and re-cure. If the filler was not fully cured before sealing, the seal coat will trap moisture and may remain soft.

Workshops differ
  • Chimahaga specifically uses mugi-urushi from a tube for the sealing coat, pressing 2–3 times to thin it, and wipes with tissue until no colour transfers. This is the same mugi-urushi used for the initial bonding coat.

After this stage

After the sealing coat has cured, the surface is ready for the first middle coat (naka-nuri) of kuro-urushi or the appropriate coloured lacquer. In a kintsugi repair, this is followed by additional naka-nuri coats with sanding (togi) between them, then the final decoration stage (maki-e, chinkin, or powder application). The sealed sabi or kokuso ground will not be visible once the lacquer coats are applied, but any imperfections in the ground—bumps, steps, or voids—will show through the finish. Allow the sealed surface to cure fully in the furo before applying the first naka-nuri coat, and sand lightly with fine abrasive if any minor unevenness remains.

Terminology

刻苧kokuso
Wood-dust or plant-fiber filler mixed with lacquer for structural gap-filling
sabi
Tonoko-and-lacquer putty ground applied to level and prepare the surface
錆漆sabi-urushi
The sabi putty itself, the tonoko-lacquer composite
砥の粉tonoko
Fine polishing-clay powder, the primary aggregate in the sabi ground
地の粉jinoko
Fired-clay powder, coarser than tonoko, used for deeper structural fills
生漆ki-urushi
Raw unrefined lacquer, the binder for all ground and filler mixes
麦漆mugi-urushi
Lacquer-and-wheat-flour adhesive, used for bonding coats and sealing
下地shitaji
The ground layers beneath the lacquer coats, of which kokuso and sabi are components
木地kiji
The bare wooden substrate before any ground or lacquer is applied
風呂furo
The humidity-controlled curing cabinet in which lacquer polymerises
刷毛hake
Lacquer brush, used for applying thin coats of lacquer
hera
Spatula for mixing and applying clay-lacquer fillers
中塗naka-nuri
Middle coats of lacquer applied over the ground
髹漆kyūshitsu
The discipline of lacquer coating, the overarching craft
Full glossary →

Left open

What the sources do not settle.

These are limits of the source material rather than steps omitted. No cited workshop resolves them, so the method above stops where the evidence does instead of filling the gap with something plausible.

  • The exact proportion of kokuso fiber to tonoko-lacquer paste is not specified numerically in any source; chimahaga describes it as 'a small amount' until the surface shows slight texture. A quantitative ratio would need to be determined by practice or a more detailed workshop.
  • The Korean sabi ground (ajiao + hofun) uses a fundamentally different binder system from the Japanese tonoko-ki-urushi mix. The sources do not provide a direct comparison of durability, sanding behaviour, or compatibility with subsequent lacquer coats between the two systems.
  • Lacquer ChengYan's comparative tests (16 filler powders) provide useful data on sanding resistance and environmental stability, but the specific performance of traditional kokuso fiber in those tests is not reported. The interaction between wood fiber and the various clay powders under UV, freezing,
  • The optimal furo humidity and temperature for curing kokuso-and-sabi fills of varying thickness is not stated explicitly. Sources give time ranges (1 day to a week) but not the specific RH and °C settings that produce those times.