Uwa-nuri is the application of the final coat of lacquer over completed ground and middle coats, forming the topmost layer of the finished object. It sits at the terminus of the coating sequence: after shitaji and naka-nuri are cured and abraded, the uwa-nuri coat is applied, cured, and then either polished to a mirror surface (riro) or left as a brush-marked, unpolished finish (nuritate). The technique demands a dust-free environment, a well-prepared hake, and precise humidity control during curing, because no subsequent coat will conceal an imperfection. The finishing path—abrasion, cream polishing, suri-urushi, and powder polishing—adds several days to weeks of careful work before the piece is complete.
Prerequisites 5 checks before starting
Completed ground (shitaji) and middle coats (naka-nuri), fully cured and abraded to a smooth, flat surface
A prepared hake of appropriate width (approximately 3 cm for a thick-type brush, per 松江藩御抱え塗師12代目 小島ゆり↗), with a flat, even cross-section
Access to a humidity-controlled curing space (furo or a lidded container with a damp towel)
This procedure involves direct contact with uncured urushi, which is a potent skin sensitiser with a delayed reaction. Work gloved and keep it off skin. Read Safety First before starting.
Raw urushi (ki-urushi) and all natural lacquer preparations are serious skin sensitizers. Contact can cause a delayed allergic reaction (24–72 hours) presenting as an intense, itchy, blistering dermatitis that can spread beyond the area of contact. The reaction worsens with repeated exposure. Wear nitrile or latex gloves for all handling of wet lacquer, and avoid skin contact with the hake, the la… Incomplete source excerpt; the note ends here.
The tsunoko polishing step (Tamenuri Studio↗) is specifically noted as binding and removing uncured traces of urushi, making the surface safe. Until this step is completed (or until the full cure period has elapsed for a nuritate finish), the surface may still contain reactive urushi and should not be handled bare-handed.
Turpentine, used in the filtration step, is a volatile solvent. Work in a ventilated area and avoid inhalation of fumes. White gasoline or kerosene, used for brush cleaning (松江藩御抱え塗師12代目 小島ゆり↗), is flammable and should be kept away from ignition sources.
Tools and materials 10 tools · 14 materials
Tools
hake (lacquer brush). Approximately 3 cm wide for a thick type; must have a flat, even cross-section for uniform application (松江藩御抱え塗師12代目 小島ゆり↗, 成盐漆作 Lacquer ChengYan↗)
kuro-riro-urushi (polishing-grade black lacquer). The standard final-coat lacquer for a mirror-polish finish; other pigmented or transparent lacquers may be used depending on the intended colour
ki-urushi (raw unrefined lacquer). Used for suri-urushi (rubbed-in lacquer) in the polishing sequence
turpentine. Small amount for diluting lacquer during filtration to aid flow through the filter paper
Japanese lint-free filter paper. Specifically designed for lacquer; must not shed fibres
600–800 grit sandpaper. For wet-sanding the surface before the final coat (松江藩御抱え塗師12代目 小島ゆり↗)
alcohol. For degreasing the substrate and the hake before application; also for removing oil residue before suri-urushi
Kikumo or equivalent polishing cream. Applied with a soft cloth for intermediate gloss building (松江藩御抱え塗師12代目 小島ゆり↗)
migakiko powder. Fine Japanese polishing powder for the final gloss stage (Tamenuri Studio↗)
tsunoko powder (burnt deer antler). Ultra-fine; used once on the fully cured surface to bind residual uncured urushi and achieve maximum gloss (Tamenuri Studio↗)
rapeseed oil. Carrier for dozuri correction paste and early-stage migakiko polishing (Tamenuri Studio↗)
white gasoline or kerosene. For rough-cleaning the hake after application (松江藩御抱え塗師12代目 小島ゆり↗)
cooking oil. For final washing of the hake bristles (松江藩御抱え塗師12代目 小島ゆり↗)
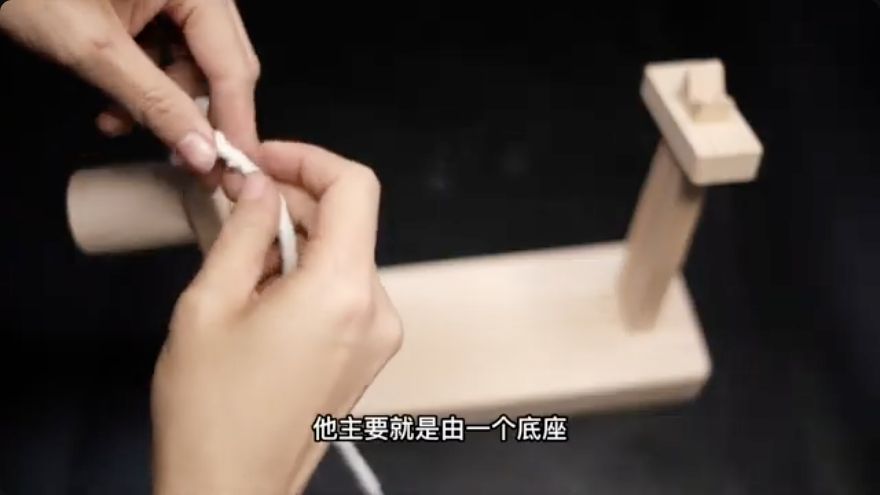
Assemble the lacquer filter press: pass the sieve through the designated hole in the base, insert the hemp rope, and tie a secure knot at the knob end. Wipe the glass plate and spatula clean with turpentine, and wait for airborne dust to settle in the room. Squeeze the lacquer onto the clean glass plate and add a small amount of turpentine to dilute it slightly; mix well until the consistency is smooth and uniform. In a small collection bowl, drop two drops of mint oil and wipe it evenly over the bottom and sides with tissue paper so the lacquer will not stick. Place the lint-free Japanese filter paper into the bowl, deposit the blended lacquer into its centre, and twist the paper like a wrapped confection to enclose the liquid. Slide one end of the twisted bundle into the gap between the two wooden strips on the left side of the press and lock it with the square wooden block. Tie the free end to the hemp rope on the right, then twist the wooden knob to apply tension. The lacquer will be squeezed out slowly into the bowl. Continue twisting until the flow stops, then use a clean spatula to scrape off any excess remaining on the paper surface. Wipe the rim of the bowl, seal it with cling film folded over the edges, and label with the colour and date.
When it is rightThe extracted lacquer is clean, free of visible impurities or dry skin, and flows smoothly. The filter paper is fully drained with no visible lacquer remaining.
When it goes wrongIf the lacquer is too thick it will clog the paper; add more turpentine and re-mix. If the paper tears under pressure, impurities will pass through—discard the batch and start again with fresh paper. If the bowl is not oiled, lacquer will adhere to the rim and be difficult to recover.
Workshop differences 1
The ChengYan studio uses a 1:1 replica of the Japanese filter press with hemp rope and a wooden knob; the same technique is demonstrated in two separate videos (成盐漆作 Lacquer ChengYan↗ and 成盐漆作 Lacquer ChengYan↗) with identical procedure.
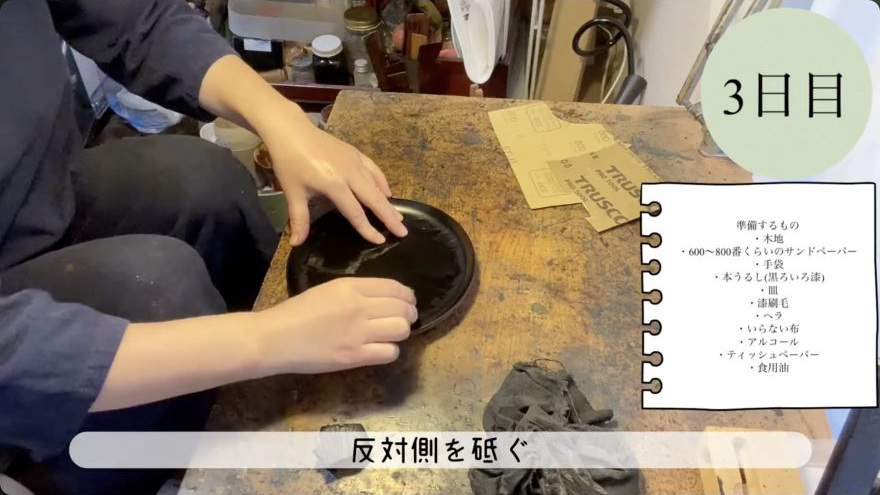
Wrap 600–800 grit sandpaper around a flat wooden block. Wet the sandpaper with water and abrade the cured surface in straight, back-and-forth passes to remove any bumps, brush marks, or unevenness. Wipe off residue with a cloth after each pass. Rotate the workpiece 90 degrees and abrade in the perpendicular direction, including the edges, to ensure flatness across the entire surface. Once the surface is flat and free of raised areas, wipe it thoroughly with alcohol to remove any oil or grease. Wipe the hake bristles with alcohol as well. Blow away loose dust from the substrate, then dip a scrap cloth in a small amount of lacquer and tap it gently against the surface to pick up any remaining dust particles that would otherwise be trapped under the new coat.
When it is rightThe surface is flat, matte, and free of bumps, brush marks, oil, and dust. The hake is clean and dry. No visible particles remain on the substrate.
When it goes wrongDust or oil trapped under the lacquer will create visible imperfections in the final coat that cannot be removed without re-sanding. If a bump is missed, it will show through the final polish. Re-sand the area and repeat the degreasing and dust-picking steps.
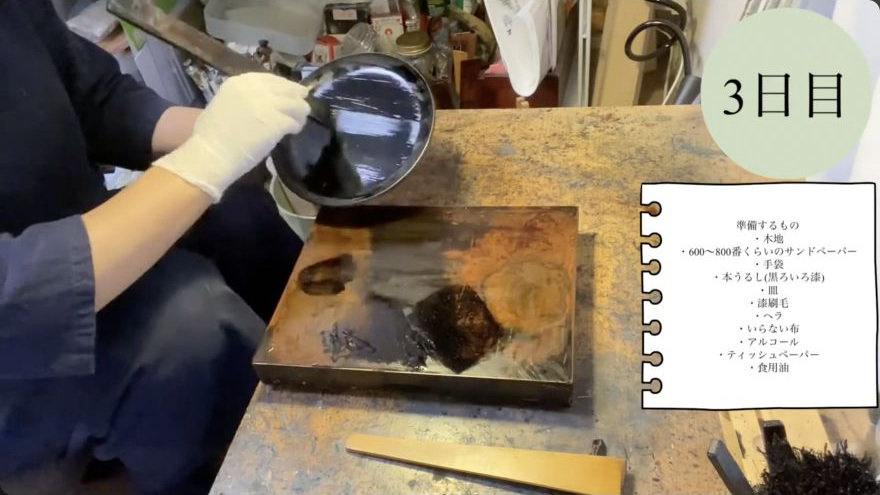
Dip the hake into the prepared kuro-riro-urushi, loading a moderate amount of lacquer onto the bristles. Begin at one edge of the surface and distribute the lacquer by laying down connected dots, then spreading them into a continuous film. Move the hake forward and back across the surface to remove any large debris or air bubbles. Once the first direction is covered, rotate the workpiece 90 degrees and apply in the perpendicular direction, overlapping the first pass to ensure even coverage. For the edges, rotate the piece and push the hake along the edge to spread the lacquer without adding more material, smoothing out any drips or thickened pools. The goal is a single, even, continuous coat of consistent thickness across the entire surface, including edges and corners. Work steadily without pausing to let the lacquer begin to set on the brush.
When it is rightAn even, continuous coat without drips, dry edges, or visible debris. The surface has a uniform wet sheen. The coat thickness is consistent—approximately 0.1 mm (松江藩御抱え塗師12代目 小島ゆり↗)—and the edges are clean without runs.
When it goes wrongDrips or uneven thickness require immediate smoothing with the hake or, if the lacquer has begun to set, a light re-application. If the hake is loaded too heavily, the lacquer will pool and run, creating thick spots that cure unevenly. If the hake is under-loaded, the coat will be too thin and will not polish to a proper gloss. Re-dip and re-spread in the affected area before the lacquer sets.
Workshop differences 1
The ChengYan studio (成盐漆作 Lacquer ChengYan↗) applies the final coat to a non-porous metal substrate and cures it in an oven for one hour rather than in a humid furo, as a method to increase adhesion on non-porous surfaces. This is an experimental approach not standard for wooden kiji.
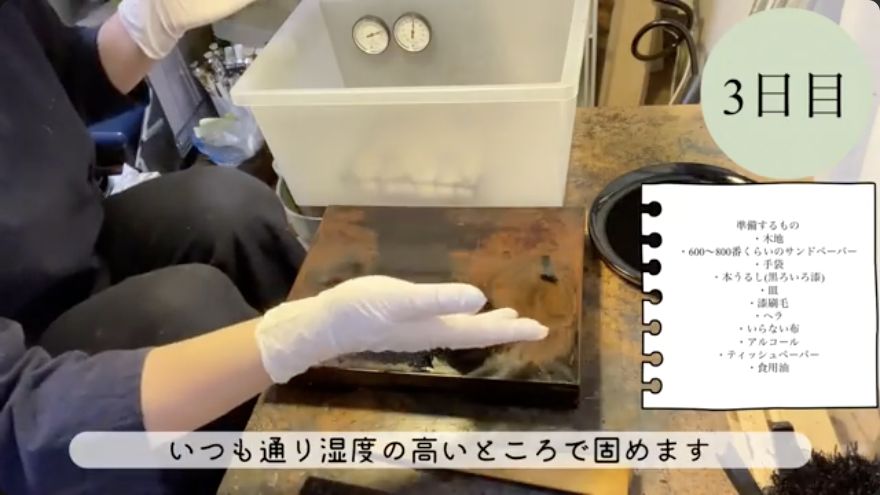
Place a damp towel in a lidded container. Set a mesh or strainer on top of the towel to create a platform. Place the lacquered piece on the mesh so the wet surface is not in direct contact with the towel. Cover with the lid. The target humidity is 70–80 percent (松江藩御抱え塗師12代目 小島ゆり↗). Monitor the curing surface: if the lacquer wrinkles or forms a skin resembling tofu film, the humidity is too high—remove the lid briefly or make the towel drier to lower the moisture. Allow the coat to cure fully before proceeding to abrasion. For the standard wooden-substrate path, this curing period is measured in days to a week depending on ambient conditions. The ChengYan studio reports one week in a hard-drying environment for final coats on metal (成盐漆作 Lacquer ChengYan↗), while the Tamenuri Studio specifies one week of final cure in the furo before the tsunoko polishing step (Tamenuri Studio↗).
When it is rightThe lacquer has cured to a hard, smooth surface with a slight sheen. It does not wrinkle, crack, or remain tacky. The surface is ready for abrasion.
When it goes wrongWrinkling (tofu-skin appearance) indicates excessive humidity; the coat must be allowed to dry further or the humidity reduced. If the surface remains tacky after the expected curing period, the humidity may be too low or the coat too thick—allow additional time. Curing in a dusty environment will embed particles in the still-soft surface, requiring re-sanding.
Workshop differences 2
The ChengYan studio (成盐漆作 Lacquer ChengYan↗) cures the first coat on stainless steel in an oven for one hour to force adhesion, then uses a hard-drying environment for the remaining coats. This is a non-standard approach for metal substrates and is not applicable to typical wooden kiji work.
For the nuritate finish (a final coat left unpolished), the procedure stops here. The cured surface is left with its natural brush marks and the soft sheen of the cured lacquer. No abrasion or polishing is performed.
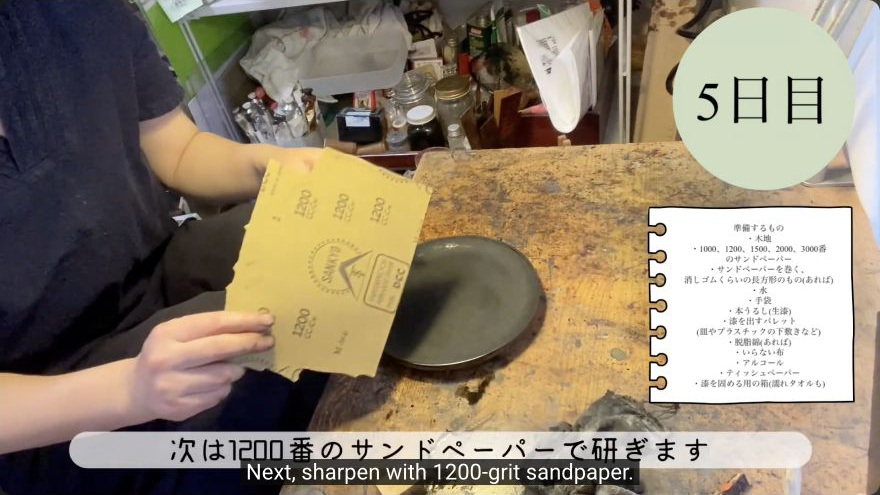
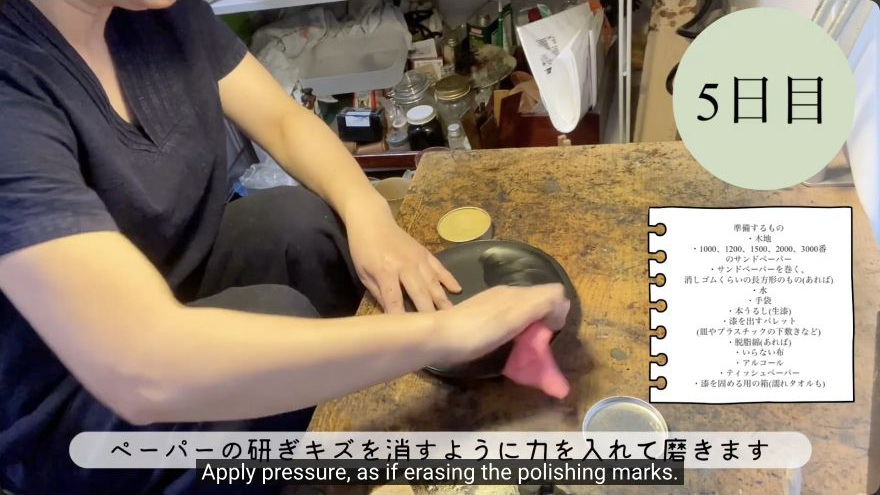
Wrap 1000-grit sandpaper around a small, flat piece of wood. With the sandpaper wet, abrade the cured surface in straight back-and-forth strokes, removing all gloss and brush marks. Rotate the workpiece 90 degrees and repeat in the perpendicular direction. The goal is a matte, slightly gray surface free of any raised areas. Be careful not to abrade the edges excessively, as the lacquer coat is only about 0.1 mm thick and the wood (kiji) can show through (松江藩御抱え塗師12代目 小島ゆり↗). Once the 1000-grit marks are removed, progress to 1200-grit, then 1500, 2000, and finally 3000 grit. At each stage, use a circular motion and slide the sandpaper rather than pressing hard. The purpose of each grit is to remove the scratches left by the previous one. At every stage, the surface should feel smooth to the fingertips. If black ripple-like patterns appear during abrasion, this is the multiple layers of kuro-urushi being cut through; it is normal and does not require immediate correction (松江藩御抱え塗師12代目 小島ゆり↗).
When it is rightThe surface is flat, matte, and free of scratches from any grit. It feels uniformly smooth to the fingertips. No wood (kiji) is exposed at the edges.
When it goes wrongAbrading too aggressively exposes the wood substrate. Recovery: apply a thin coat of lacquer with the hake over the exposed area, allow it to cure, and re-abrade from the current grit. If a deep scratch from a coarser grit is missed and carried into finer stages, it will remain visible in the final polish and must be re-abraded from the coarser grit.
Dab Kikumo polishing cream onto a soft material, such as a T-shirt. Work the abraded area in circles with moderate force to eliminate residual fine scratches. As you polish, wipe away the cream; the fabric will darken as it absorbs lacquer residue. Apply pressure using the fleshy portion of your hand. Perform this cream-polishing cycle two additional times to develop the gloss (松江藩御抱え塗師12代目 小島ゆり↗). Prior to applying suri-urushi, eliminate all oil traces from the polishing cream by wiping the surface with alcohol or washing it with dish soap (松江藩御抱え塗師12代目 小島ゆり↗). Soak a scrap cloth or cotton wool in a small quantity of ki-urushi. Work the lacquer into the coated surface using circular strokes, covering the entire area without omission. Once the lacquer has been fully worked in, remove the surplus with a clean scrap cloth. Allow the surface to harden in a humid environment (松江藩御抱え塗師12代目 小島ゆり↗).
When it is rightA glossy surface is gradually appearing after the cream polishing. After suri-urushi, the surface has a deeper, more even gloss and is ready for final hardening and the last polishing stages.
When it goes wrongLeaving oil residue from the cream on the surface will interfere with the adhesion of the suri-urushi lacquer. Always degrease with alcohol or soap before applying ki-urushi. If the suri-urushi is applied too thickly, it will not level properly and will leave a cloudy, uneven surface—wipe off more excess and re-harden.
Workshop differences 1
The Tamenuri Studio (Tamenuri Studio↗) uses dozuri powders (green and gray-white) mixed with rapeseed oil as a correction paste applied with a bamboo cloth or microfiber, specifically to remove scratches or unevenness after an uwazuri coat before proceeding. This is an intermediate correction step not shown in the 松江藩御抱え塗師12代目 小島ゆり↗ sequence.
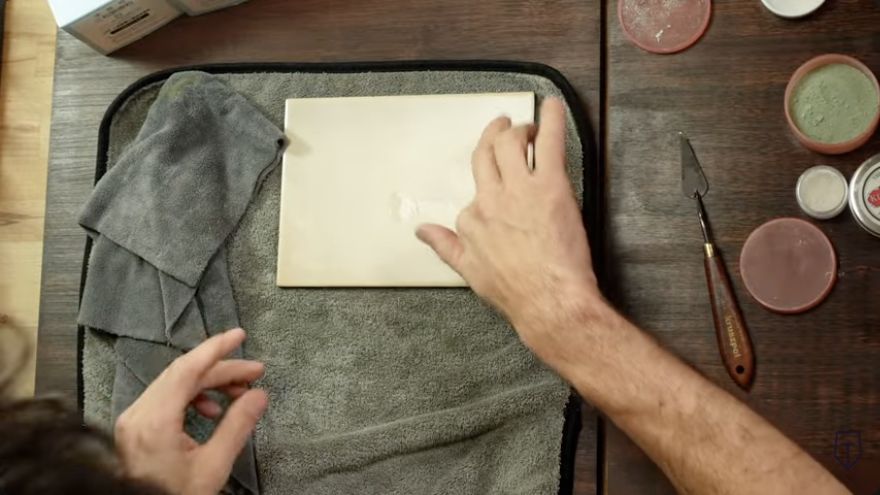
For the early and middle stages of final polishing, apply a tiny amount of rapeseed oil to the surface and add migakiko powder. Work it in using a fine microfiber cloth in circular motions. This stage is used after the first or second uwazuri layers have been cured and abraded (Tamenuri Studio↗). After polishing, clean the oil residue from the surface before any further lacquer application. For the absolute final stage, ensure the piece is almost finished and has completed its final cure. Use an absolutely tiny amount of oil—barely enough to moisten the fingers. Apply migakiko powder directly to the surface and polish using the fingertips or the soft part of the palm. Hands must be clean, soft, and moisturized to avoid scratching the delicate final lacquer (Tamenuri Studio↗). For the very last step, after one week of final curing in the furo, apply tsunoko powder to the clean, cured surface and polish by hand. Tsunoko powder not only enhances gloss to a maximum level but also binds and removes any uncured traces of urushi, making the surface chemically stable and safe (Tamenuri Studio↗). This step is performed only once on fully finished pieces.
When it is rightA high-gloss, mirror-like finish is achieved without visible scratches. After tsunoko, the surface has maximum gloss and is chemically stable, with no residual uncured urushi.
When it goes wrongUsing dry or rough skin during the hand-polishing stage can scratch the delicate final lacquer surface. If scratches appear, return to a finer grit of sandpaper, re-abrade, and repeat the polishing sequence. Applying tsunoko too early, before the lacquer is fully cured, will not effectively bind uncured urushi and the surface may remain reactive. Allow the full one-week final cure before this step.
Workshop differences 1
The Tamenuri Studio (Tamenuri Studio↗) also uses Chemie Koch Micro Cut M3 (a German automotive polishing paste) as a substitute for dozuri powders, and Kiku-mol paste (a Japanese polishing paste in tins) for surfaces not yet ready for migakiko. These are alternatives for makers without access to traditional Japanese polishing materials.
After the final tsunoko polishing, the piece is complete and should be handled only with clean, dry hands. The surface is chemically stable but remains a natural organic coating; avoid prolonged contact with solvents, extreme heat, or direct sunlight. If the piece is a nuritate (unpolished final coat), the surface is left with its natural brush marks and soft sheen; no further treatment is required, but the lacquer should still be allowed its full cure period before handling. Between the uwa-nuri application and the polishing sequence, the piece must remain in a clean, dust-free environment. The hake used for application should be cleaned immediately: scrape lacquer off with the hera, rough-wash with white gasoline or kerosene, then wash in cooking oil on a plate until the oil lightens, scrape the oil off, and wipe with tissue (松江藩御抱え塗師12代目 小島ゆり↗). Do not allow lacquer to harden in the bristles.
Terminology 14 terms
上塗uwa-nuri
the final coat of lacquer applied over ground and middle coats
塗立nuritate
a final coat left unpolished, retaining brush marks and a soft sheen
呂色漆roiro-urushi
polishing-grade black lacquer intended for a mirror finish
刷毛hake
lacquer brush, typically of hair, used for applying coats
箆hera
spatula used for scraping, mixing, and cleaning
摺り漆suri-urushi
lacquer rubbed into the surface with a cloth to enhance gloss
研ぎtogi
flattening by abrasion between coats
磨きmigaki
final polishing to achieve the finished surface
風呂furo
the humidity-controlled curing cabinet
木地kiji
the bare wooden substrate
下地shitaji
the ground layers beneath the coats
中塗naka-nuri
middle coats applied between ground and final coat
The sources do not provide a specific curing duration for the uwa-nuri coat on a standard wooden kiji under 70–80% humidity. The 松江藩御抱え塗師12代目 小島ゆり↗ video shows the setup but does not state how many days to wait before abrading. The Tamenuri Studio↗ source gives one week for the final cure before tsunoko, but th
The nuritate finish (a final coat left unpolished) is named in the terminology but is not demonstrated as a distinct technique in any of the provided sources. The procedure for applying the coat is identical to the polished path, but the specific handling, curing duration, and surface expectations f
The sources do not specify the exact number of uwa-nuri coats required. The 松江藩御抱え塗師12代目 小島ゆり↗ video demonstrates a 'second layer of kuro-riro-urushi,' implying at least two coats, but the total number and the curing interval between them are not stated. The Tamenuri Studio↗ source references 'the first or seco
The ChengYan studio's use of an oven for curing (成盐漆作 Lacquer ChengYan↗) and a 'hard-drying environment' for final coats represents a non-standard approach. The relationship between oven-curing and traditional furo curing, and whether oven-curing is acceptable for wooden substrates, is not addressed in the sou
Each illustration is a frame from a source video, checked against the step it accompanies. Steps without a verified frame link to the original source.
7 of 7 steps include a verified frame.
The method combines several workshop demonstrations; it is not a settled standard. 3 of the 8 videos listed are not cited by any step. See the 4 unanswered questions.