Method 01

Preparing the substrate

The surface decides everything that follows.

Substrate preparation is the foundational phase of lacquer work, sitting between the shaped wooden core (kiji) and the first decorative or protective coat (naka-nuri or uwa-nuri). It involves reinforcing the wood with cloth, building up a smooth and stable ground of clay-and-lacquer putty over multiple cured coats, abrading each layer to flatness, and finishing the surface to a clean, dust-free state ready to receive the next stage of coating. The work is physically demanding and iterative: each coat must cure fully in a humidity-controlled environment before the next is applied, and the maker must judge thickness by feel and sight rather than by instrument. Getting this phase right determines whether the final mirror polish will be achievable or whether the ground will telegraph every flaw through the top coats.

Before this: A shaped, fully dried wooden core (kiji) free of cracks, splits, and residual moisture · Access to a humidity-controlled curing space (furo or chiljang) capable of maintaining 70–80 % relative humidity · Nitrile or latex gloves for all contact with raw urushi (ki-urushi) · A flat, clean work surface and adequate ventilation

Read the handbook chapter
Safety gate

This stage mostly precedes lacquer application, but the workpiece may carry cured or partly cured urushi. Read the safety chapter before starting. Read Safety First before you begin.
Raw urushi (ki-urushi) is a potent skin sensitiser containing urushiol. Contact can cause a severe allergic dermatitis (urushiol dermatitis) with a delayed onset of 24–72 hours. The absence of immediate symptoms does NOT mean the reaction has not been triggered. The reaction is cumulative: repeated exposure lowers the threshold for a reaction, and once sensitised, even minute contact can cause a s
Wear nitrile or latex gloves for ALL contact with raw lacquer, ground mixtures, and cloth adhesives. Do not rely on cotton gloves, which can be permeated by urushiol. If bare skin contacts raw urushi, wash immediately and thoroughly with soap and water, and monitor for 72 hours.
Do not eat, drink, or touch your face while handling raw lacquer. Urushiol is absorbed through the skin and can be transferred to mucous membranes.
Ensure adequate ventilation when working with lacquer and solvents (alcohol, white gasoline). Avoid inhalation of lacquer fumes during curing.
Kojima Yuri explicitly notes: do not remove gloves until the brush-cleaning step is complete, as residual lacquer on the hands will re-contaminate the workspace.

Tools

  • Hera (spatula)— Used to scrape, press, and spread cloth and ground material firmly into the surface. Hold at a low angle for pressing; a steeper angle for spreading
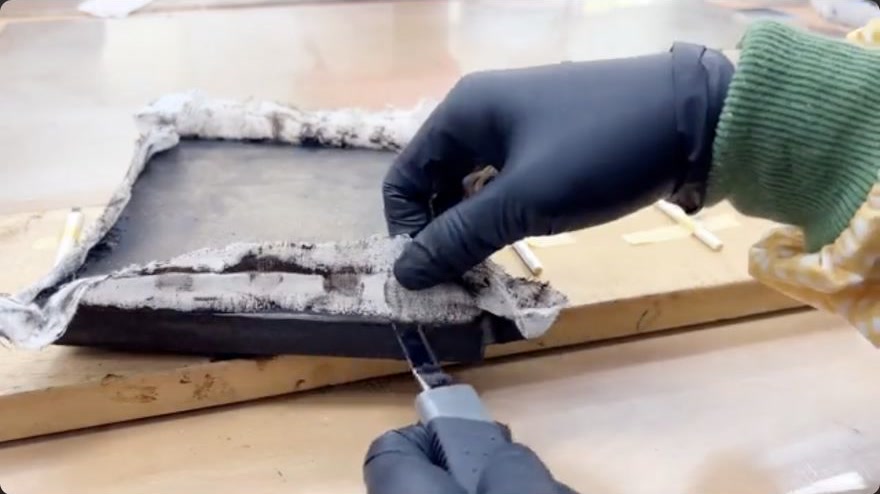
  • Knife— For cutting cloth to size and trimming cured ground edges
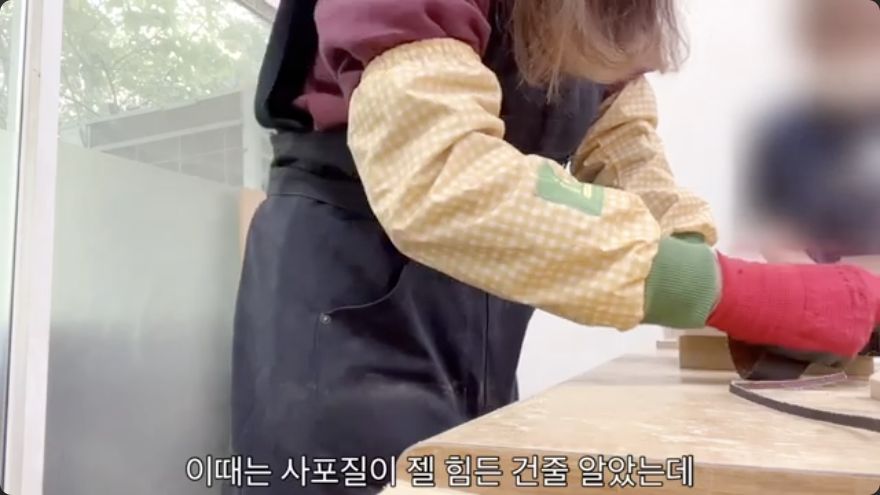
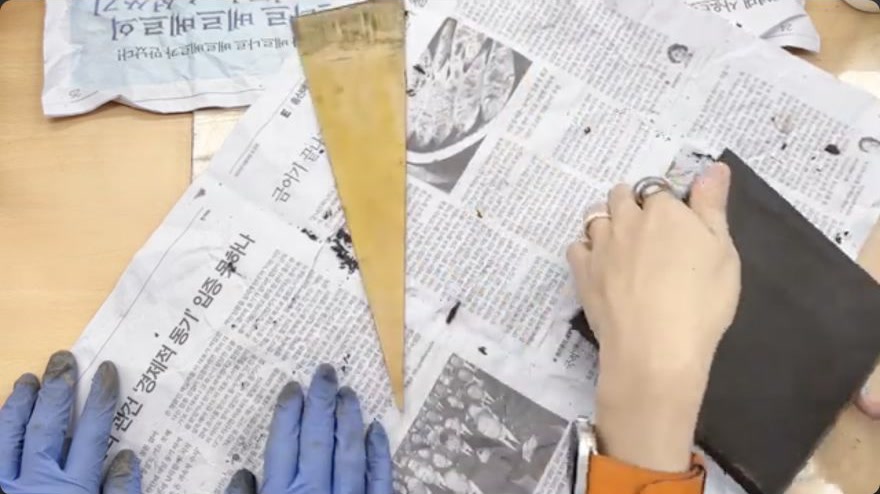
  • Flat wood block— A small, flat square block wrapped with sandpaper for controlled, even abrasion. Prevents the maker from pressing unevenly with bare fingers
  • Furo / chiljang (curing cabinet)— A sealed or semi-sealed chamber maintained at 70–80 % RH. Korean workshops call it chiljang; Japanese workshops call it furo. Must be properly conditioned before use
  • Wet towel and mesh/strainer— For creating a humid micro-environment around the piece during curing (Kojima Yuri method)
  • Lint-free cloth or cotton wool— For dust pickup, degreasing, and applying thin lacquer films

Materials

  • Hemp or cotton cloth (nunokise)— Cut to size for wrapping the vessel body and reinforcing edges; Korean workshops use hemp, Japanese workshops often use cotton or linen
  • Nori-urushi / hochil (rice-paste and lacquer adhesive)— Glutinous rice paste mixed with ki-urushi; used to bond cloth to the wood. Both components are costly—use sparingly
  • Jinoko or tonoko (fired-clay or polishing-clay powder)— The filler component of the sabi ground. Korean workshops use fine yellow clay (tohwachil); Japanese workshops use jinoko or tonoko. Ratio to lacquer is approximately 1 : 0.8 (filler to lacquer) per ChengYan testing
  • Ki-urushi (raw unrefined lacquer)— Binds the clay filler and the cloth adhesive. A serious skin sensitiser—see safety
  • Sandpaper, multiple grits— 600–800 grit for final surface prep (Kojima Yuri); 1000–3000 grit for progressive flattening (Kojima Yuri Day 5); 400 grit for initial ground abrasion (ChengYan); two sheets of unspecified grit for light between-coat sanding (HwihoCraft)
  • Alcohol (isopropyl or denatured)— For degreasing the substrate and cleaning brush bristles before lacquer application
  • Water— For wet sanding to suppress dust and cool the abrasive surface
  • Lint-free cloth or non-woven wipes— For dust pickup and final surface cleaning

The working sequence

7 steps, each traceable.

Each illustration is a frame taken from the source video at the moment cited, and checked against the step it accompanies. Where no frame passed that check, the step runs without one rather than carrying a misleading picture.

A method merged from several workshops is not a settled standard. 1 of the 5 workshops listed is not cited by any step. 5 further questions the sources leave unanswered are set out at the end.

01 Source · 0:00
No verified frame Open the source at the cited moment.

Prepare the bare wood surface (kiji)

Inspect the shaped wooden core for cracks, splits, residual tool marks, and any areas of uneven moisture. Lightly abrade the entire surface with 400-grit sandpaper wrapped around a flat wood block, moving in straight back-and-forth passes. Rotate the work 90 degrees and repeat in the perpendicular direction, including all edges and corners. The goal is a uniformly slightly rough surface that will accept the cloth adhesive and ground material. Wipe away all wood dust with a dry lint-free cloth. The wood must be fully dry and free of oils, waxes, or previous finishes; any residue will prevent adhesion of the cloth and ground layers.

When it is rightThe surface feels uniformly slightly rough under the fingertips, with no glossy patches, no deep tool marks, and no visible dust. The wood is clean and dry.

When it goes wrongResidual oil, wax, or moisture on the wood will cause the cloth and ground to delaminate during curing. Recovery: strip the offending area with a solvent wipe, allow it to dry completely, and re-abrade before proceeding.

Workshops differ
  • ChengYan tests ground materials on pre-coated oak boards that lack cloth reinforcement entirely, showing that a kiji can be ground directly without nunokise for flat panels. For curved or thin-walled vessels, cloth reinforcement is strongly preferred.
02 Source · 0:52
No verified frame Open the source at the cited moment.

Apply cloth reinforcement (nunokise)

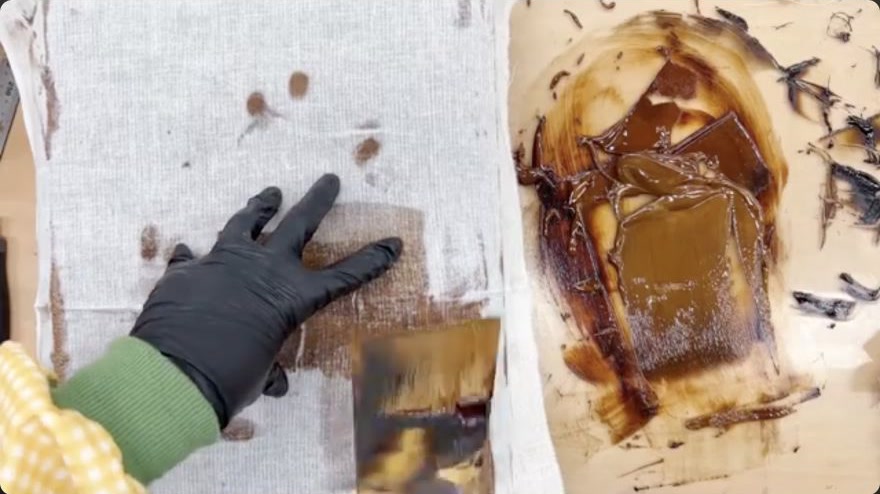
Cut hemp or cotton cloth to size with a knife, allowing a small overlap at the seams. Prepare the cloth adhesive (nori-urushi / hochil) by mixing glutinous rice paste with ki-urushi until the consistency is workable—sticky enough to hold the cloth but fluid enough to penetrate the wood grain. Apply a thin, even coat of the adhesive to the vessel's sides and corners using the hera, held at a low angle and scraped firmly across the surface. Lay the cloth onto the adhesive and press it down with the hera, working from the centre outward to expel air and ensure full contact. Corners and edges are the most difficult areas: scrape firmly and repeatedly to eliminate wrinkles. If a wrinkle forms, lift the cloth, re-apply adhesive, and re-press immediately—do not allow the adhesive to set over a wrinkle. Both the rice paste and the lacquer are expensive; apply only as much as the cloth needs to bond.

When it is rightThe cloth lies flat and smooth against the wood across the entire surface, with no visible wrinkles, bubbles, or gaps. The edges are clean and the cloth is firmly bonded.

When it goes wrongWrinkled cloth or poor adhesion at corners will create ridges that no amount of ground will fully hide. Recovery: while the adhesive is still tacky, lift the affected area, smooth the cloth, and re-press with the hera. If the adhesive has set, the area must be sanded flat and the cloth re-applied.

Workshops differ
  • Korean najeonchilgi workshops (HwihoCraft) use hemp cloth and a glutinous-rice-paste adhesive (hochil). Japanese workshops typically use cotton or linen with nori-urushi. The principle is identical; the fibre and paste differ.
03 Source · 2:57
No verified frame Open the source at the cited moment.

Cure the cloth-reinforced substrate

Place the cloth-wrapped vessel in the furo or chiljang (curing cabinet). The cabinet must be properly conditioned—Korean makers describe it as needing to be 'comfortable,' meaning the temperature and humidity are stable and at the correct level. Maintain high humidity (70–80 % RH) and a warm temperature. Leave the piece to cure for at least overnight, or until the next day. Do not open the cabinet repeatedly, as fluctuations in humidity will stress the curing lacquer and can cause the cloth to lift or the adhesive to remain tacky. The lacquer in the adhesive is polymerising, not merely drying; this is a chemical change that requires sustained humidity.

When it is rightThe cloth is firmly bonded to the wood. The surface is hard to the touch, with no tackiness. The cloth edges are crisp and the overall shape is stable.

When it goes wrongIf the humidity is too low, the lacquer will not polymerise and the surface will remain soft or tacky after the expected cure time. If the humidity is too high, the surface may wrinkle or develop a skin. Recovery: adjust the towel dryness or cabinet settings and extend the cure period. Do not sand or apply the next coat until the surface is fully hard.

Workshops differ
  • Kojima Yuri (Japanese) uses a simpler setup: a wet towel in a container with a mesh strainer on top, the piece placed on the mesh, and a lid to trap humidity. Target 70–80 % RH. If the lacquer wrinkles like tofu skin, the humidity is too high—make the towel drier.
  • HwihoCraft (Korean) uses a dedicated chiljang cabinet maintained at high temperature and high humidity, described as needing to be 'comfortable' for correct curing.
04 Source · 3:54
No verified frame Open the source at the cited moment.

Trim and lightly sand the cured cloth

After full curing, trim any protruding cloth edges or rough lacquer bits with a knife. Hold the blade at a shallow angle and shave rather than cut, to avoid gouging the wood beneath. Then perform a light sanding pass: wrap sandpaper around a flat wood block and abrade the surface with gentle, even pressure. HwihoCraft uses two sheets of sandpaper for this pass and emphasises light sanding to avoid damaging the underlying cloth and wood. The goal is to remove high spots and create a surface that is smooth enough to accept the ground material, not to flatten the entire vessel. Wipe away all dust with a dry cloth before the next step.

When it is rightA smooth, even surface with no protruding cloth, no sharp edges, and a uniform matte finish. The cloth is fully integrated into the surface.

When it goes wrongOver-sanding can cut through the cloth and expose the wood, or thin the adhesive layer until it delaminates. Under-sanding leaves a rough surface that will telegraph through the ground. Recovery for over-sanding: apply a thin coat of lacquer to the exposed area, cure, and re-sand. For under-sanding: simply sand more carefully.

05 Source · 4:36
No verified frame Open the source at the cited moment.

Mix and apply the first ground coat (sabi / tohwachil)

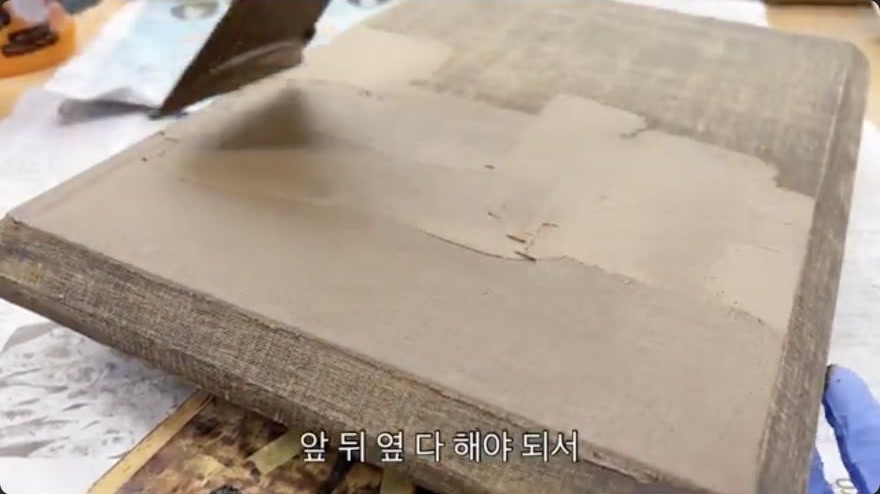
Prepare the ground material by mixing fine clay powder (jinoko, tonoko, or the Korean equivalent tohwachil—fine yellow clay) with ki-urushi. ChengYan's testing uses a ratio of approximately 1 : 0.8 (filler to lacquer by weight); adjust by feel until the mixture is thick enough to hold on the hera without sliding off but fluid enough to be scraped into the surface. Apply the mixture to the vessel with the hera, held at a low angle and scraped firmly to press the material into the gaps between cloth threads and into the wood grain. The thickness is critical: if too thin, the cloth pattern will show through; if too thick, the coat will crack as it cures. The goal is an 'appropriate' thickness that fills all gaps and creates a continuous, even layer. Work in sections, keeping the wet edge moving to avoid lap marks. For flat panels, apply in straight passes; for curved vessels, follow the contour.

When it is rightA smooth, even ground layer that completely covers the cloth and fills all gaps. The surface is matte and uniform in thickness, with no visible cloth pattern and no cracks.

When it goes wrongCracking due to excessive thickness, or visible cloth pattern due to insufficient thickness. Cracks require sanding the cracked area flat and re-applying a thinner coat. Visible cloth requires adding another coat. Both are recoverable but add time.

Workshops differ
  • ChengYan tests 16 different filler powders (tile ash, bentonite, talc, gypsum, porcelain powder, deer antler ash, atomic filler, etc.) mixed with ki-urushi. Porcelain powder is easier to sand; talc is harder and more abrasion-resistant. The choice of filler affects sanding behaviour and long-term stability under UV, freezing, and water exposure.
  • Korean workshops (HwihoCraft) use fine yellow clay (tohwachil) and emphasise that the thickness must be 'appropriate'—neither too thin nor too thick. Japanese workshops use jinoko or tonoko with ki-urushi to make sabi.
06 Source · 7:00
No verified frame Open the source at the cited moment.

Cure, sand, and repeat ground coats

Cure the first ground coat in the furo or chiljang at 70–80 % RH for at least overnight. Once fully hard, sand the surface with the grit appropriate to the material: ChengYan uses 400-grit sandpaper for 20 strokes to test sanding resistance; Kojima Yuri progresses from 1000-grit upward for finer work. Wrap the sandpaper around a flat wood block and abrade with water, moving in straight back-and-forth passes. Rotate the work 90 degrees and repeat in the perpendicular direction. Wipe off residue with a cloth after each pass. The goal is to remove all bumps, ridges, and tool marks, leaving a flat, matte surface. If the surface is not yet smooth, apply a second coat of ground material, cure, and sand again. HwihoCraft notes that this process is iterative and often requires multiple coats, each sanded before the next is applied. The physical effort is significant, especially for larger vessels. Continue until the surface is uniformly smooth and free of the cloth pattern.

When it is rightA progressively smoother and more uniform ground layer with each coat. The final surface is flat, matte, and free of cloth pattern, bumps, or cracks. It feels smooth to the fingertips with no detectable ridges.

When it goes wrongPersistent roughness or cracks that require additional coats and sanding. If a crack appears, sand it flat, re-apply a thinner coat, and cure. If the surface remains rough after three or more coats, the filler-to-lacquer ratio may be wrong—adjust toward more lacquer for a more flexible ground, or more filler for a harder one.

Workshops differ
  • Kojima Yuri (Day 5) uses a progressive grit sequence: 1000, 1200, 1500, 2000, 3000 grit, each removing the marks of the previous. At each stage the surface should feel smooth to the fingertips. If black ripple-like patterns appear, this is the multiple layers of kuro-urushi being abraded and is normal.
  • HwihoCraft uses two sheets of sandpaper for light between-coat sanding and emphasises not over-sanding to avoid damaging the underlying layers.
07 Source · 0:00
No verified frame Open the source at the cited moment.

Final surface preparation before decorative coats

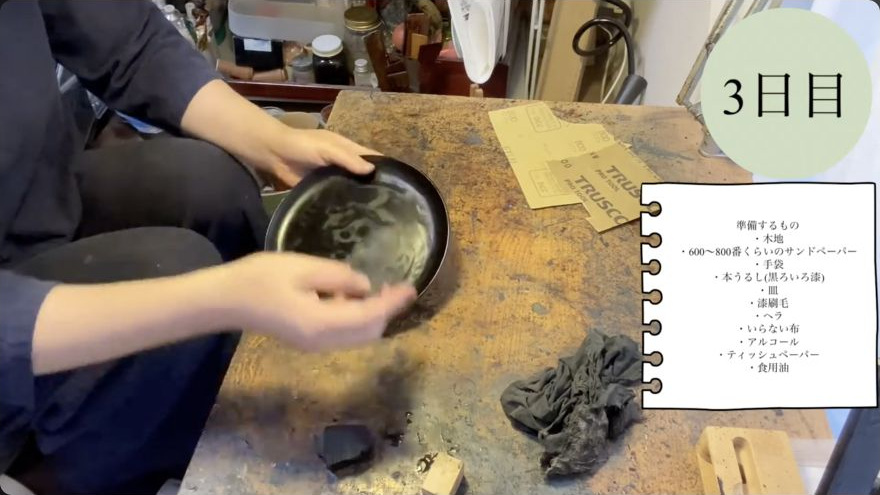
With the ground fully cured and sanded to smoothness, perform the final surface preparation. Wrap 600–800-grit sandpaper around a flat wood block, wet the sandpaper with water, and abrade the surface in straight vertical passes. Wipe off residue with a cloth after each pass. Rotate the work 90 degrees and abrade in the perpendicular direction, including all edges. The goal is a flat, bump-free surface ready to receive the first decorative or protective coat. Next, degrease: wipe the entire surface with alcohol to remove any residual oil or skin oils. Wipe the hake (lacquer brush) bristles with alcohol as well. Blow away loose dust from the kiji. Finally, dip a scrap cloth in a small amount of lacquer and tap it gently against the surface to pick up any remaining dust particles that the alcohol wipe missed. The surface must be clean, dry, and free of dust and oil before the next coat is applied.

When it is rightThe surface is flat, free of bumps, clean, dry, and free of dust and oil. It is ready to receive the first naka-nuri or decorative coat.

When it goes wrongDust or oil trapped under the next coat will create imperfections—small bumps, pinholes, or adhesion failures. Recovery: sand the affected area lightly, re-degrease, re-dust, and proceed. If the contamination is widespread, the entire surface must be re-prepared.

Workshops differ
  • Kojima Yuri uses 600–800 grit for this final prep pass, which is coarser than the 1000–3000 grit sequence used for polishing. This is because the goal here is flatness and cleanliness, not gloss.
  • Tamenuri Studio (uwazuri context) filters the lacquer through Yoshino paper before application and uses a lint-free cloth tampon for application, indicating that even at the final-coat stage, particle control is critical. This principle applies to the ground coats as well: filter or strain the ground material if it contains visible particles.

After this stage

Once the substrate is fully prepared—cloth bonded, ground built and sanded to smoothness, surface degreased and dusted—the piece is ready for the first naka-nuri (middle coat) or the first decorative application (maki-e, raden, chinkin, etc.). The prepared surface should be stored in a stable, dust-free environment until the next coat is applied, ideally within a few days. If a delay is expected, the surface can be lightly sealed with a thin coat of ki-urushi to prevent dust accumulation, but this adds a layer that must be sanded before the decorative work begins. The curing cabinet (furo/chiljang) should be kept conditioned and ready for the next curing cycle.

Terminology

木地kiji
The bare wooden substrate before any lacquer or ground is applied
布着せnunokise
Cloth reinforcement over the wood, bonded with lacquer-paste adhesive
下地shitaji
The ground layers beneath the decorative coats
sabi
A putty ground of tonoko (polishing clay) and lacquer, used for filling and smoothing
地の粉jinoko
Fired-clay powder used as the filler in the ground layers
砥の粉tonoko
Fine polishing-clay powder, a finer grade than jinoko
糊漆nori-urushi
Lacquer and rice-paste adhesive, used to bond cloth to the wood (Korean: hochil)
生漆ki-urushi
Raw unrefined lacquer, the binder for all ground and adhesive mixtures
風呂furo
The humidity-controlled curing cabinet (Korean: chiljang)
刷毛hake
Lacquer brush, used for applying coats of lacquer
hera
Spatula, used for scraping, pressing, and spreading ground material
中塗naka-nuri
Middle coats, the first decorative or protective coats applied over the prepared ground
토화칠tohwachil
Korean clay-and-lacquer ground mixture (equivalent to sabi or jinoko-based ground)
호칠hochil
Korean rice-paste-and-lacquer adhesive for cloth bonding (equivalent to nori-urushi)
칠장chiljang
Korean curing cabinet, equivalent to the Japanese furo
Full glossary →

Left open

What the sources do not settle.

These are limits of the source material rather than steps omitted. No cited workshop resolves them, so the method above stops where the evidence does instead of filling the gap with something plausible.

  • The exact clay-to-lacquer ratio varies by workshop and by the specific clay used. ChengYan's 1 : 0.8 ratio is from a controlled test; HwihoCraft and Kojima Yuri describe the consistency qualitatively ('appropriate thickness,' 'workable') without giving a numerical ratio. A practitioner should determ
  • The number of ground coats required is not fixed. HwihoCraft describes the process as iterative and 'often requiring multiple coats,' but does not specify a number. This depends on the wood, the cloth, the clay, and the desired smoothness.
  • The specific grit sequence for between-coat sanding varies: HwihoCraft uses two unspecified sheets, Kojima Yuri uses 600–800 grit for final prep and 1000–3000 for polishing, ChengYan uses 400 grit for testing. A definitive grit progression for ground-coat sanding is not standardised across the sourc
  • The sources do not address how to handle substrate preparation for very thin-walled or hollow vessels (e.g., small boxes, cups) where the cloth and ground may warp the shape during curing. This is a practical concern not covered in the provided videos.
  • The long-term stability of different filler types under real workshop conditions (UV, humidity cycling, water contact) is only partially addressed by ChengYan's one-week tests. Long-term performance data beyond one week is not available in the sources.