Roiro (呂色) is the terminal stage of the lacquer-finishing sequence: after the ground layers (shitaji), middle coats (naka-nuri), and final coat (uwa-nuri) have all been applied and cured in the furo, the surface is abraded flat and then polished by hand to a mirror shine. It sits at the very end of the coating process and demands patience, clean and soft hands, and the ability to judge surface hardness by touch, sight, and the breath test. The procedure is subtractive—each pass removes a microscopic layer until the gloss created by the underlying coats is fully revealed—and a single careless stroke can undo hours of work.
Prerequisites 3 checks before starting
All lacquer coats (shitaji, naka-nuri, uwa-nuri) are fully cured in the furo (風呂) under controlled humidity.
The surface is free of major defects; any deep scratches or unevenness should be corrected with a correction paste (dozuri) before beginning the roiro sequence.
The workpiece is clean and free of dust or fingerprints.
Parts of this procedure involve uncured urushi or fine abrasive dust. Work gloved and ventilated. Read Safety First before starting.
Raw urushi (ki-urushi, 生漆) is a serious skin sensitiser. Contact can cause urushiol dermatitis with a delayed onset of 24 to 72 hours, meaning the reaction may not appear until the work session is long over. Symptoms include intense itching, redness, and blistering. Wear nitrile or latex gloves whenever handling ki-urushi, and avoid skin contact with any tool or cloth that has touched it. If conta… Incomplete source excerpt; the note ends here.
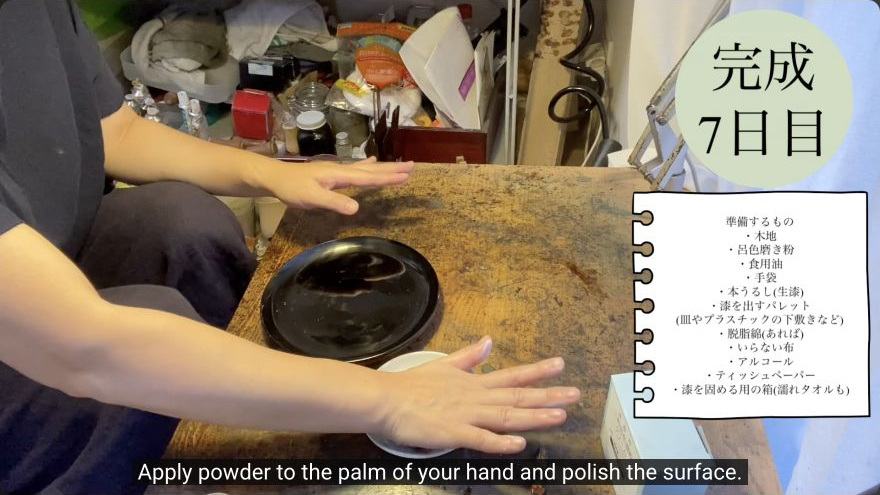
During the final hand-polishing stage (oil and powder), the lacquer is semi-dry and still contains active urushiol. Kojima Yuri (Day 7) explicitly recommends wearing gloves for this step, even though bare hands produce a slightly higher gloss. If you choose to work bare-handed, wash your hands thoroughly with soap and water immediately after, and monitor for delayed reactions over the following 72… Incomplete source excerpt; the note ends here.
Polishing powders (roiro powder, migakiko, tsunoko) are fine particulates. Avoid inhaling them; work in a well-ventilated area and do not blow or shake the powder off the surface. Wipe it off with a damp tissue instead.
Tools and materials 6 tools · 9 materials
Tools
Small flat wood block. For wrapping sandpaper during the initial flattening passes.
Soft cloth (T-shirt material or microfiber). For applying Kikumo cream and for wiping. Tamenuri Studio specifies fine, short-hair microfiber.
Cotton ball or rolled scrap cloth. For rubbing in ki-urushi during suri-urushi.
Palette or small dish. Holds the small quantity of ki-urushi for suri-urushi.
Tissue or non-woven fabric. For applying the thin oil layer and for wiping off final powder.
Bamboo cloth (optional). Tamenuri Studio alternative for applying correction paste.
Materials
Sandpaper, 1000 / 1200 / 1500 / 2000 / 3000 grit. Water-resistant; used in ascending order for progressive flattening.
Kikumo (Kiku-mol) polishing cream. Japanese polishing compound in a tin; applied to a soft cloth. Tamenuri Studio uses Kiku-mol paste for surfaces not yet ready for migakiko.
Ki-urushi (生漆). Raw unrefined lacquer, used in a very small quantity for suri-urushi. A serious skin sensitiser—see safety.
Alcohol or dish soap. For removing oil residue from the polishing cream before suri-urushi.
Cooking oil (or rapeseed oil). Applied as a thin carrier layer for the final hand-polishing powder. Tamenuri Studio specifies rapeseed oil.
Roiro powder (呂色粉) / migakiko (磨き粉). Fine Japanese polishing powder. Turns brownish as it absorbs oil. Tamenuri Studio uses migakiko as the primary powder.
Tsunoko (tsunoko powder). Burnt deer-antler powder, ultra-fine. Used as the absolute final step; binds and removes traces of uncured urushi. Tamenuri Studio only.
Cotton wool or scrap cloth. For applying ki-urushi in suri-urushi and for wiping off excess.
Water. Used with sandpaper; one drop may be added to ki-urushi if gloss is difficult to achieve.
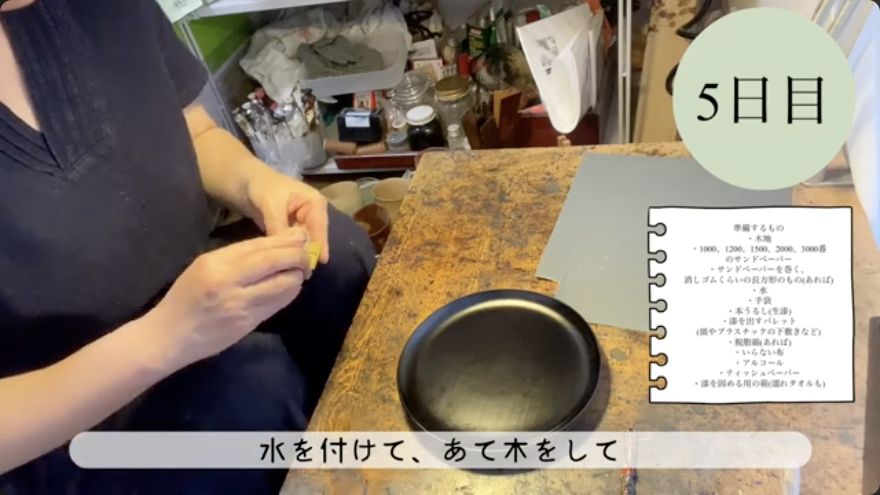
Wrap 1000-grit water-resistant sandpaper around a small, flat piece of wood so the paper lies taut. Wet the surface of the lacquered work with water. Hold the block flat against the surface and abrade in straight back-and-forth strokes, using moderate pressure. After a full pass, rotate the workpiece 90 degrees and repeat so that the grain of the sandpaper cuts in two perpendicular directions. The purpose of this coarse grit is to remove all remaining gloss, brush marks, bumps, and minor dents; finer grits do not have the cutting power to do this job. Work the entire surface evenly. Be careful near the edges: the lacquer coat is only about 0.1 mm thick, and over-abrading will expose the bare wood (kiji, 木地) beneath.
When it is rightThe surface is uniformly matte and slightly grey, flat to the fingertip, with no visible brush marks, gloss, or raised areas.
When it goes wrongAbrading too aggressively or too long near the edges exposes the wood (kiji). Recovery: apply a thin coat of lacquer with a hake (刷毛) over the exposed area, allow it to cure, and re-abrade from 1000 grit.
Workshop differences 1
Tamenuri Studio recommends correcting any remaining scratches or unevenness with a dozuri paste (green or grey-white powder mixed with a tiny amount of rapeseed oil, applied with a bamboo cloth or microfiber) before beginning the standard grit sequence, particularly on small objects like pens.
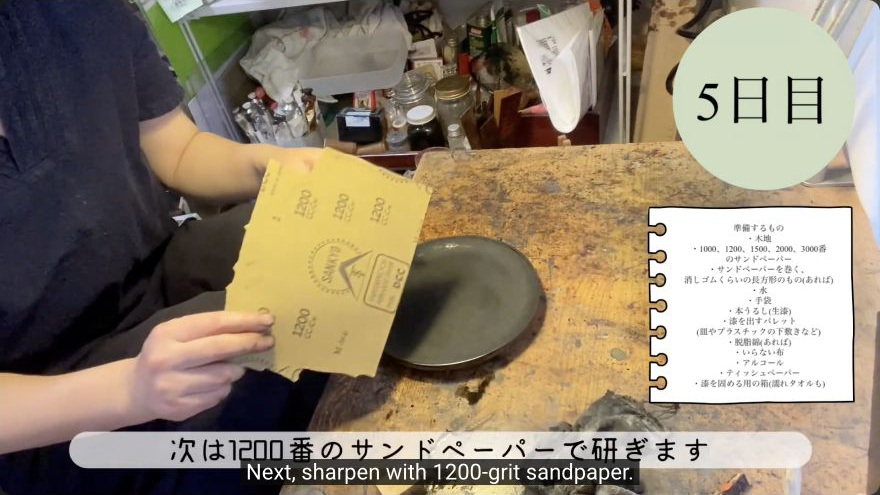
Move to 1200-grit sandpaper, again wetted. Change the motion from straight strokes to gentle circular movements, and slide the sandpaper across the surface rather than pressing down. The goal at each grit is to remove the scratch pattern left by the previous grit, not to cut material. Continue in sequence: 1500, 2000, then 3000 grit, each time checking that the marks of the preceding grit are gone before advancing. At every stage the surface should feel progressively smoother to the fingertips. If black ripple-like patterns appear during abrasion, this is the multiple layers of kuro-urushi (黒漆) being cut through; it is normal and will resolve as you continue. Do not skip grits, and do not apply heavy pressure at any stage—the lacquer film is thin and the wood is close.
When it is rightAfter 3000 grit the surface is flat, smooth, and free of any visible scratches from the previous grit. It feels uniformly glassy under the fingertip with no directional texture.
When it goes wrongApplying too much pressure at any grit can cut through the lacquer to the wood. Recovery: re-coat the affected area with lacquer, cure, and restart the grit sequence from 1000. Skipping a grit leaves cross-hatched scratches that the next grit cannot fully remove, requiring a return to the coarser grit.
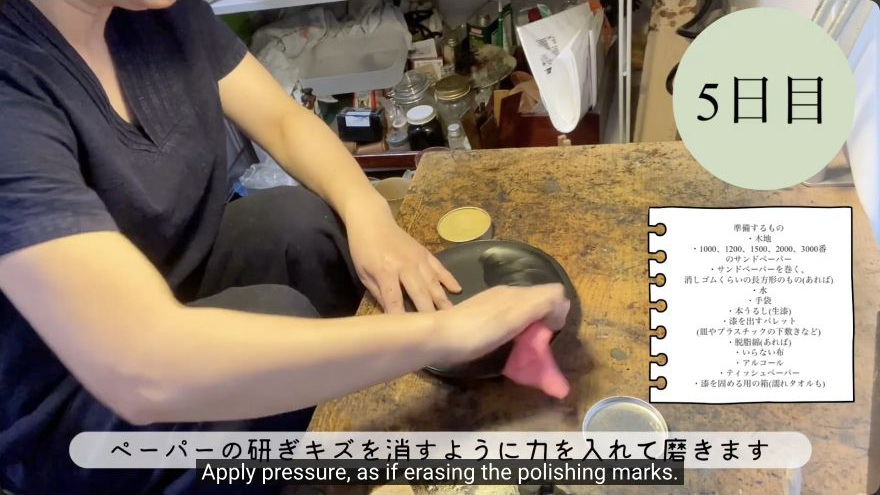
Squeeze a small amount of Kikumo (Kiku-mol) polishing cream onto a soft cloth such as a T-shirt or fine microfiber. Using the fleshy part of the hand, rub the cream into the surface in firm circular motions, applying steady pressure to lift away any residual abrasion marks. Continue polishing while periodically wiping off the cream with a clean section of cloth; the cloth will turn black as it picks up lacquer residue. Repeat the apply-and-polish cycle two to three times, each pass building more gloss. Stop when the surface shows a pronounced, even sheen and no abrasion marks remain. Do not over-polish at this stage—the cream is a transitional step, not the final finish.
When it is rightA clear, even gloss is visible across the entire surface. Abrasion marks are gone. The surface reflects a soft, diffuse sheen rather than a sharp mirror image.
When it goes wrongIf the gloss is patchy or the surface still looks dull, the cream has not fully removed the fine scratches. Continue polishing with a fresh application of cream. If the surface has become hazy or cloudy, too much pressure was applied; return to 2000-grit sandpaper to re-flatten, then resume cream polishing.
Workshop differences 1
Tamenuri Studio uses a two-stage powder approach instead of a single cream: first a dozuri correction paste (green or grey-white powder with rapeseed oil) for defect removal, then migakiko powder with a tiny amount of rapeseed oil worked in with a microfiber cloth for the early-to-mid polishing stage.
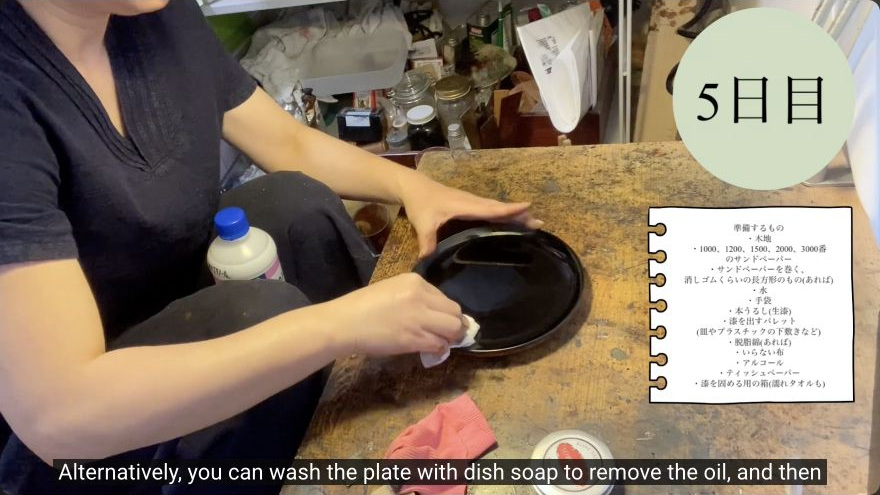
Wipe the entire surface thoroughly with alcohol to dissolve and remove all oil and cream residue left by the Kikumo polishing. Alternatively, wash the surface with a little dish soap and water, then dry with a clean cloth. The surface must be completely free of oil before the next step, because any residual oil will prevent the ki-urushi from bonding properly. Once clean, place a small amount of ki-urushi (生漆) on a palette or small dish. Roll a scrap of cloth or a ball of cotton wool into a tight pad for the next step.
When it is rightThe surface is clean, matte, and free of any oily film. A small quantity of ki-urushi is ready on the palette, and the cotton pad is prepared.
When it goes wrongIf oil residue is not fully removed, the ki-urushi will not adhere and will wipe off unevenly, leaving a patchy, dull finish. Recovery: re-wipe with alcohol, confirm the surface is clean, and restart the suri-urushi step.
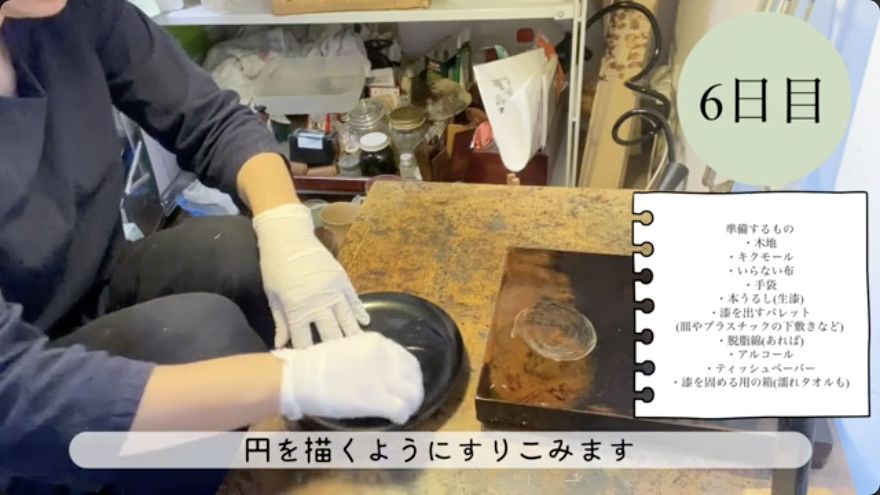
Dip the cotton pad or rolled cloth into the ki-urushi on the palette—only a small amount is needed. Working in circular motions, rub the lacquer evenly into the coated surface, covering the entire area without missing any spots. The motion should be gentle and continuous; the lacquer is being worked into the micro-pores of the polished surface, not applied as a coat. Once the whole area has been treated, take a clean scrap of cloth and wipe off the surplus lacquer in one pass, leaving a thin, even film. If you find the gloss is difficult to achieve, add exactly one drop of water to the ki-urushi, mix it, and rub it in again over the entire surface. Allow the lacquer to harden in a high-humidity location for approximately one day.
When it is rightThe surface has a subtle, even sheen from the thin film of rubbed-in lacquer. It is not glossy yet—that will come from the final hand-polishing—but the surface looks uniformly treated with no dry or heavy spots.
When it goes wrongIf the lacquer is applied too thickly, it will not wipe off evenly and will cure as a raised film, ruining the flatness. Recovery: abrade the affected area back to matte with 1000-grit sandpaper and restart from the cream-polishing step. If the gloss does not develop after hardening, the lacquer may not have bonded; re-wipe with alcohol, add one drop of water to fresh ki-urushi, and rub in again.
Workshop differences 1
Kojima Yuri (Day 7) notes that when humidity and temperature are low, the piece should be moved to a slightly more humid location to encourage hardening of the rubbed-in lacquer.
No verified frame Open the source at the cited moment.
After the suri-urushi, allow the piece to rest. Kojima Yuri (Day 6) specifies one day in a high-humidity location; Kojima Yuri (Day 7) works on a shorter timescale of 10 to 15 minutes after wiping off the lacquer, adjusting for ambient conditions. To test whether the surface is ready for final polishing, blow gently across the surface. If the lacquer is still wet, the breath will not leave a visible mark and the surface will remain clear. As the lacquer sets, the exhaled breath will progressively fog the surface white. When the breath consistently turns the surface white, the lacquer is in the process of hardening and is ready for the final polish. If the breath does not turn white, the lacquer is not yet hard enough—wait longer or increase ambient humidity. Do not proceed to hand-polishing on a soft surface, as the pressure will mar the finish.
When it is rightThe surface is firm to a light fingertip touch. Blowing across it produces a visible white fog that lingers briefly, confirming the lacquer is setting. The surface is clear and free of cloudiness.
When it goes wrongIf the surface is still tacky or soft, hand-polishing will smear the lacquer and create an irreparable haze. Recovery: allow more time in a humid environment, re-test with the breath method, and only proceed when the surface is firm.
Workshop differences 1
Tamenuri Studio specifies a full week of final curing in the furo (風呂) before the tsunoko finishing step, indicating a longer cure for small, high-gloss objects like pens.
Using a tissue, spread a very thin layer of cooking oil (or rapeseed oil) across the entire lacquered surface. Place a small amount of roiro powder (呂色粉) or migakiko (磨き粉) in the palm of your hand. Rub the surface using the fleshy part of the palm and fingers in broad circular motions, working the powder into the oil. The powder will gradually take on a brownish hue as it absorbs the oil—this colour change is your indicator that the polishing is progressing. Continue until the surface reflects light sharply; the test is that a light bulb or overhead lamp reflects off the surface as a distinct, clear image. Wearing gloves is recommended to prevent urushi dermatitis, though bare hands yield a slightly higher gloss. Ensure your hands are clean, soft, and free of rough skin, which can scratch the delicate final surface. If the gloss is difficult to achieve, the lacquer may still be semi-dry; wait for it to harden further before attempting again.
When it is rightThe surface reflects light like a mirror. The overhead light source is visible as a sharp, undistorted reflection. The powder on the hand is uniformly brownish, indicating the oil has been fully absorbed and lifted.
When it goes wrongIf the oil is not fully removed by the powder, the gloss will remain dull and oily. Continue polishing until the powder is brownish and the surface is shiny. If the surface has been scratched by rough skin or a contaminated hand, the damage must be corrected by returning to 2000-grit sandpaper, re-polishing with cream, and repeating the suri-urushi and hand-polishing sequence.
Workshop differences 2
Tamenuri Studio uses migakiko powder with an absolutely tiny amount of rapeseed oil (barely enough to moisten the fingers) for the final hand-polishing stage, emphasising clean, soft, moisturised hands to avoid scratching.
In the Myanmar lacquer tradition (Asian Lacquer Craft Exchange Research Project↗), the final polish uses a charcoal-and-water paste rubbed with cotton cloth, followed by petrified-wood powder rubbed dry by hand, and finally the skin of the hand or arm rubbed across the surface until it produces a squeaky sound, indicating the polish is complete.
No verified frame Open the source at the cited moment.
For the absolute final step, Tamenuri Studio applies tsunoko (burnt deer-antler) powder to the clean, fully cured surface and polishes by hand. Tsunoko is ultra-fine and expensive; it not only enhances the gloss to its maximum but also binds and removes any remaining traces of uncured urushi, rendering the surface chemically stable and safe for handling. This step is used only once, on fully finished pieces, after a week of final curing in the furo. After the tsunoko pass (or after the roiro-powder pass if tsunoko is not used), wipe off all remaining powder with a clean tissue or non-woven fabric. The surface should be left with a clean, mirror-like gloss and no residue. With experience, the gloss becomes progressively cleaner and more even; beginners should expect to repeat the water-and-lacquer-and-polish cycle if the first pass does not yield a satisfactory result.
When it is rightThe surface has a clean, deep, mirror-like gloss with no visible powder residue, no oily film, and no scratches. The reflection is sharp and undistorted. The piece is safe to handle without gloves.
When it goes wrongIf the gloss is not clean or shows a faint haze, repeat the process: add one drop of water to the ki-urushi, rub it in, allow it to set, and polish again with oil and powder. If tsunoko is applied before the lacquer is fully cured, it will not effectively bind uncured urushi and the surface may remain tacky or reactive.
Workshop differences 1
Kojima Yuri's sequence ends with the roiro-powder polish and a wipe-off; tsunoko is not part of her beginner course. The Myanmar tradition ends with a hand-rub until a squeaky sound is produced, with no separate ultra-fine powder step.
Once the roiro polish is complete and the surface is clean, the piece is finished. It should be stored in a stable environment away from direct sunlight, extreme heat, and prolonged dryness, all of which can cause the lacquer film to craze or yellow over time. The mirror surface is delicate; handle by the edges or with clean, dry hands. Avoid contact with solvents, oils, or abrasive cleaners. If the piece will not be used for an extended period, a light wipe with a soft, dry cloth before storage will prevent dust from settling into the polished surface.
Terminology 10 terms
呂色roiro
Polishing to a mirror surface; the name of this final finishing technique.
摺り漆suri-urushi
Rubbed-in lacquer; the step of working a thin film of ki-urushi into the polished surface by hand.
生漆ki-urushi
Raw unrefined lacquer sap; used in small quantities for suri-urushi.
磨きmigaki
Final polishing; the hand-polishing stage that reveals the mirror gloss.
研ぎtogi
Flattening by abrasion between coats; the sanding stage that precedes polishing.
風呂furo
The humidity-controlled curing cabinet in which lacquer is allowed to harden.
木地kiji
The bare wooden substrate beneath the lacquer coats.
上塗uwa-nuri
The final coat of lacquer, applied before the roiro polishing sequence.
黒漆kuro-urushi
Black lacquer; the multiple layers of which are cut through during abrasion.
刷毛hake
Lacquer brush; used to apply repair coats if the surface is over-abraded.
The exact composition and particle size of 'roiro powder' (呂色粉) as used by Kojima Yuri is not specified in the sources; it is distinct from migakiko and tsunoko but the precise mineral or organic content is not stated. A practitioner would need to source it from a lacquer-supply vendor.
The Myanmar polishing sequence (charcoal paste → petrified wood → hand rub) uses a different lacquer system (tisi sap from Melanuria usitata) and different substrates (bamboo, horsehair). Whether the grit-and-powder sequence from the Japanese sources can be directly applied to Myanmar tisi lacquer,
Tamenuri Studio's dozuri powders (green and grey-white) are described as 'aggressive correction' powders, but the exact correction threshold—how deep a scratch they can remove before a full re-coat is needed—is not quantified.
The sources do not specify the exact humidity and temperature range for the furo during the suri-urushi hardening step beyond 'high humidity' and 'one day.' A precise RH and temperature range would be useful for practitioners working outside a traditional workshop environment.
Each illustration is a frame from a source video, checked against the step it accompanies. Steps without a verified frame link to the original source.
6 of 8 steps include a verified frame.
The method combines several workshop demonstrations; it is not a settled standard. 1 of the 5 videos listed are not cited by any step. See the 4 unanswered questions.