Hira-maki-e is the flat sprinkled-powder decoration technique in urushi lacquerwork: a design is drawn in a thin coat of painting lacquer (e-urushi), metal powder is sprinkled onto the still-wet surface, and the result is later polished to a mirror or satin metallic finish. It sits after the ground coats (shitaji) have cured and before any final finishing coats, and it is the foundational maki-e method from which togidashi-maki-e and taka-maki-e are derived. The technique demands a steady hand for the line, close observation during sprinkling to catch powder that sinks into the wet lacquer, and patience through the drying and polishing stages.
Prerequisites 4 checks before starting
A fully cured ground surface (shitaji) free of dust and imperfections
The design pattern planned and, if needed, lightly traced or sketched on the surface
Access to a furo or a stable, humidity-controlled environment for the drying stage
Familiarity with basic urushi handling and the fact that raw lacquer is a skin sensitiser
Parts of this procedure involve uncured urushi or fine abrasive dust. Work gloved and ventilated. Read Safety First before starting.
Raw urushi (ki-urushi) and all urushi-based products are serious skin sensitisers. The allergic reaction (urushiol dermatitis) is delayed, typically appearing 24–72 hours after contact, and can be severe. Avoid skin contact with wet lacquer, e-urushi, and any lacquer-containing mixture. Wear appropriate gloves when handling raw materials. The finger cots used during maki-e are to prevent fingerpri… Incomplete source excerpt; the note ends here.
Work in a well-ventilated area. Avoid inhaling lacquer fumes or powder dust. Do not eat, drink, or touch your face while working.
If skin contact with raw urushi occurs, wash the area thoroughly with soap and water immediately. If a rash develops, seek medical attention and inform the clinician that the cause is urushiol (the sensitisers in urushi and poison ivy are chemically related).
Tools and materials 6 tools · 5 materials
Tools
maki-e line brush (neji-gawari or men-sō-hitsu). A fine brush for drawing the e-urushi design line. Asai uses a neji-gawari; a fine men-sō-hitsu is an alternative. Nylon or nail-art brushes are mentioned but not used by Asai.
kebo (hair stick). A small brush-like tool with fine hairs, used to wrap and sprinkle fine powders (up to No. 5). Held so the powder sits 'fluffy' on the bristles for even distribution.
funzutsu (sprinkling tube). Bamboo or aluminium tube with a sieve face, held in the hand and shaken to release coarser powders (No. 8–10 and above). The angle of the tube controls the working area.
finger cots. Worn on one or more fingers to prevent fingerprints and skin oils from contaminating the wet lacquer and attracting stray powder. Not a urushi-safety measure.
soft brush. Used to sweep away excess loose powder after sprinkling. A small human-hair hake held close to the ferrule works well for precision areas.
600-mesh sandpaper. Used for the final polishing pass to reveal the metallic luster of the powder. ChengYan specifies this grit for the finishing stage.
Materials
e-urushi (painting lacquer). The design lacquer drawn onto the surface. May be stiffened with bengara (red iron-oxide pigment) for a more visible, tacky line. Asai describes it as 'quite stiff' in the kintsugi context.
marufun (round gold powder). No. 1 or No. 2 grade is standard for hira-maki-e. Keshifun (the finest gold powder) is used for the most delicate work. Coarser grades (No. 8–10) require a funzutsu rather than a kebo.
diluted ki-urushi. Used as a fixing coat over fine powders (300 mesh or finer). One thin coat is sufficient.
suki-urushi (transparent lacquer). Used as a second fixing coat over coarse powders, or as the primary binder in the ChengYan coloured-powder method. Dilution ratio affects layer thickness.
rapeseed or salad oil. Non-drying oil for cleaning the maki-e brush after use. Prevents residual urushi from hardening in the bristles.
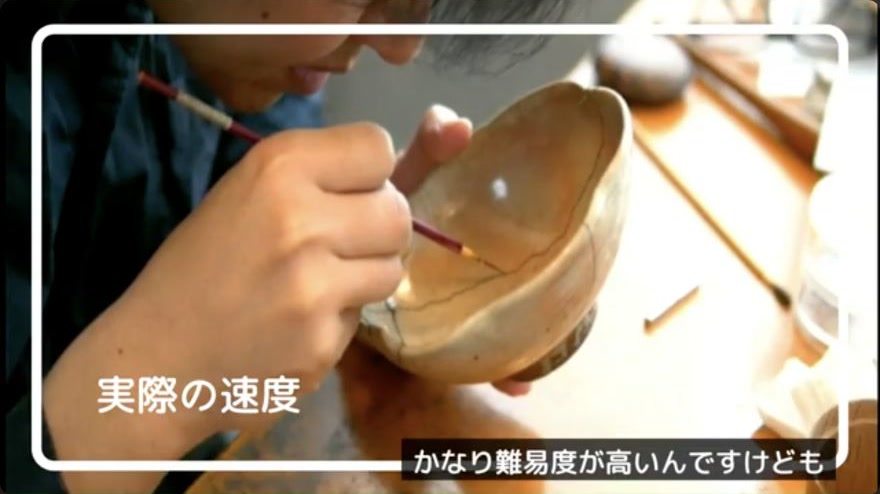
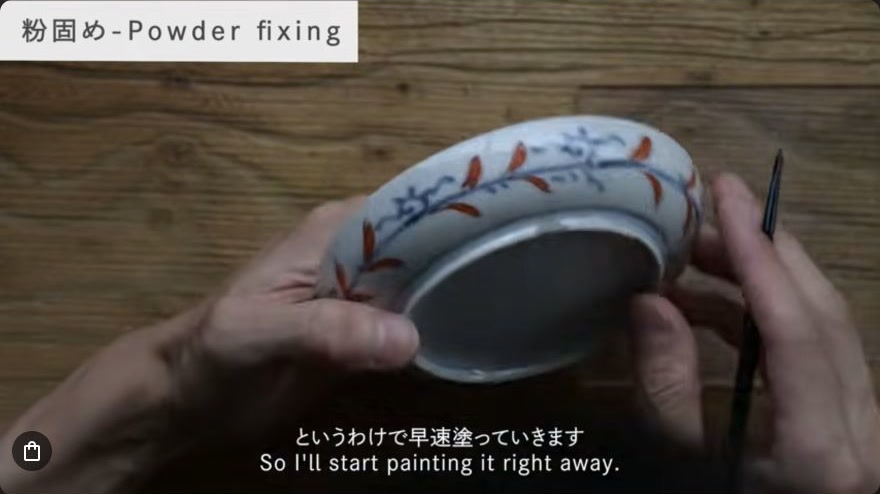
Load a fine maki-e line brush (neji-gawari or men-sō-hitsu) with e-urushi, optionally stiffened with bengara red iron-oxide pigment. Hold the brush in the right hand and rotate the vessel with the left hand to change the working angle. Pull the brush tip continuously to lay a thin, even line along the intended design. Work the interior of the vessel first, as it is more difficult; the exterior offers more room to support the hand. A slightly over-wide line is acceptable because the powder will cover it, but an under-width line will expose the ground or black lacquer beside the gold. Prioritise complete coverage of the intended area over extreme thinness. After finishing the line, clean the brush immediately with a non-drying oil such as rapeseed or salad oil; residual urushi will harden and render the brush unusable.
When it is rightA continuous, thin line of red-tinted lacquer fully covering the intended area, with no gaps showing the brown sabi or black surface beneath. The line is tacky and ready for powder.
When it goes wrongA line narrower than the intended area exposes sabi or black urushi beside the gold. Hand contact with the wet line stretches it. Recovery: ensure the line is at least as wide as the intended area; avoid hand contact with wet lacquer. If the line is stretched, it cannot be easily corrected—redraw the affected section before sprinkling.
Workshop differences 2
In the kintsugi context the line follows a crack and must fully cover it; in the decorative cup context the e-urushi is applied as a design band on the edge.
ChengYan applies a base coat of suki-urushi (transparent lacquer) over a kuro-urushi or pearl-red ground before sprinkling, rather than drawing a discrete line with e-urushi.
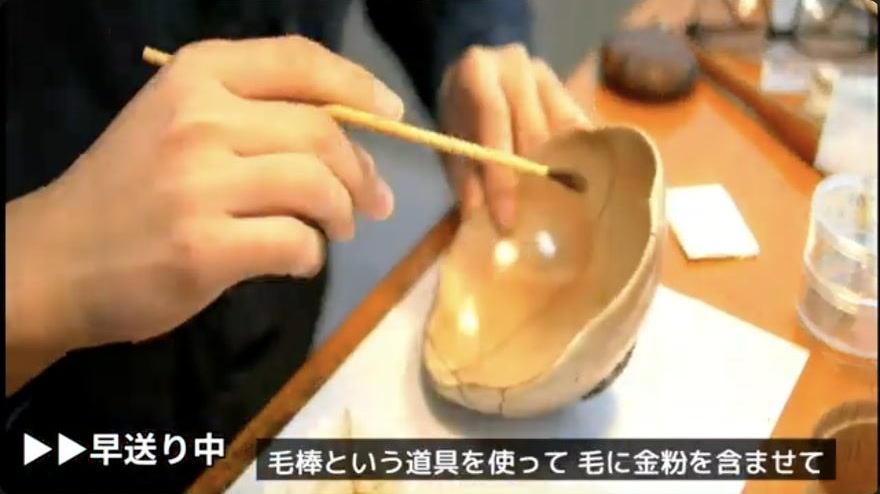
Select the powder grade appropriate to the desired finish. For standard hira-maki-e, marufun No. 1 or No. 2 is the workhorse; keshifun (the finest gold powder) is reserved for the most delicate work. For fine powders up to No. 5, wrap the powder loosely around the kebo hair stick so it sits 'fluffy' on the bristles, ready to be shaken or tapped off. For coarser powders (No. 8–10 and above), load a funzutsu sprinkling tube—bamboo or aluminium, held in the hand and shaken to release the powder; the angle of the tube controls the working area of the sieve face. Load a slightly generous amount so that the tool does not run dry mid-sprinkle.
When it is rightPowder is loosely held on the kebo bristles, or the funzutsu is loaded and ready to shake. The powder is dry, free-flowing, and not clumped.
When it goes wrongToo little powder on the kebo means the bristles will contact the wet lacquer directly and stretch the line. Clumped powder will not distribute evenly. Recovery: re-wrap the kebo with a fresh, dry load or shake the funzutsu to break up clumps.
Workshop differences 3
Asai uses kebo for No. 1 and No. 2 marufun in both the kintsugi and cup demonstrations.
Tamenuri Studio uses bamboo and aluminium sprinkling tubes (funzutsu) for maki-e powders, noting that the angle controls the working area.
ChengYan uses funzutsu for coloured lacquer powders in 50-mesh and 80-mesh sizes.
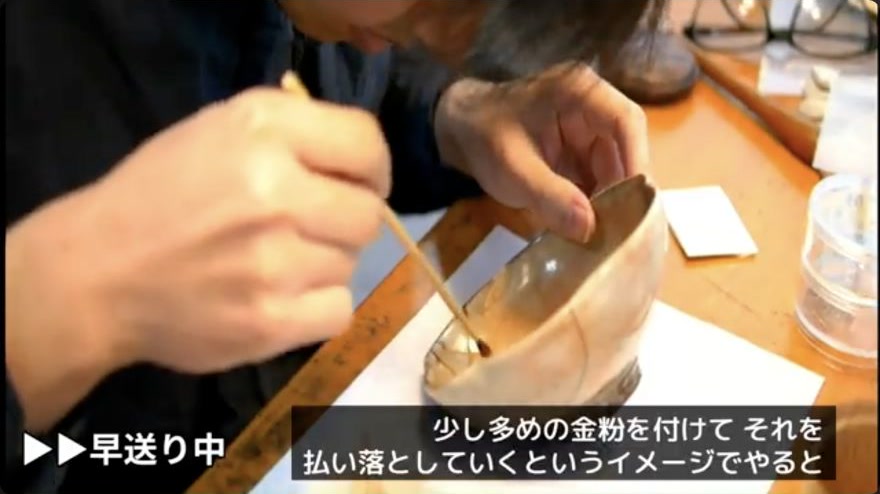
Immediately after finishing the drawn line, sprinkle the loaded powder over the wet e-urushi. The key principle is to apply enough powder that the kebo bristles do not directly stroke the wet line. Sprinkle slowly and evenly, working from one end of the line to the other. Because the lacquer is wet, fine powder tends to sink into it; observe the surface continuously. If the underlying red lacquer becomes visible where powder has sunk, immediately sprinkle more powder onto that specific spot. Do not attempt to finish in one pass; take time to observe and re-apply as needed. Wait approximately five minutes after the initial sprinkling, then check whether red lacquer has resurfaced through sunken powder; if so, add a second layer. The goal is a sharp, continuous gold line with no visible red or brown showing through.
When it is rightThe surface appears covered in a dull, kinako-like (soybean-flour) colour, indicating full coverage without gaps. A sharp, continuous gold line with no visible red urushi or brown sabi beneath or beside the gold.
When it goes wrongFaint red patches appear where powder has sunk into the wet lacquer. Recovery: re-sprinkle gold powder onto those specific spots. With too little powder, the kebo bristles can directly stroke the wet lacquer and stretch the line—this is harder to recover and may require redrawing the affected section.
Workshop differences 2
Asai sprinkles immediately after drawing the line, emphasising that judging the semi-dry (hiku-chi) timing is unreliable because it varies with season, urushi origin, and sap type; the recommended approach is to sprinkle immediately rather than wait.
ChengYan applies suki-urushi as a binder first, then sprinkles coloured powders, then flattens the powder into the lacquer surface before curing.
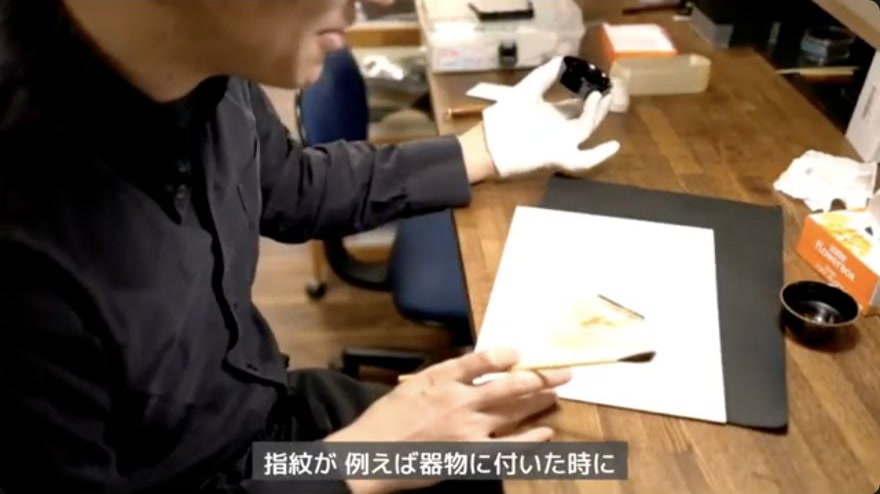
After the powder has had time to adhere to the wet lacquer, gently brush off the excess powder that is not adhered. Use a soft brush or the kebo itself to sweep away loose particles from the surface and from adjacent areas that must remain clean. Wearing a finger cot on the working hand is critical during this phase: gold powder sticks readily to skin oils, and a single fingerprint will attract a visible deposit of stray powder. The cots are not a urushi-safety measure; their purpose is to keep the surface free of oils and marks. If stabilising the vessel with a finger, rest a cotted finger on the surface away from the fresh lacquer line.
When it is rightOnly the powder adhered to the wet lacquer remains; loose dust is removed. The surface shows a clean, even gold line with no stray specks on the surrounding ground.
When it goes wrongFingerprints remain on the vessel, causing gold powder to stick to them and creating unwanted marks. Recovery: if a fingerprint has attracted powder, it is very difficult to remove cleanly; prevention via finger cots is the only reliable safeguard.
Workshop differences 3
Asai wears a glove on the left hand during the brushing-off phase in the cup demonstration.
In the kintsugi workshop, a finger cot is worn on the right pinky to prevent fingerprints from attracting gold powder.
Tamenuri Studio wears cots on one or more fingers to stabilise the object while another tool works on maki-e detail.
No verified frame Open the source at the cited moment.
Once the maki-e is complete and excess powder has been removed, the work must be left to dry. Asai specifies a drying period of 3 days before proceeding to polishing. The piece should be placed in a furo (humidity-controlled curing cabinet) or a stable environment with adequate humidity to allow the lacquer to cure properly. The unpolished gold will look dull and unappealing at this stage; this is normal and will be resolved in the polishing step. Do not touch, move, or handle the piece during this period, as the powder is not yet firmly set.
When it is rightThe piece is stable and dry enough to withstand the abrasion of polishing. The powder line is firm and does not shift under light pressure.
When it goes wrongPolishing or handling too early will dislodge the powder and ruin the design. Recovery is not possible; the section must be redrawn and re-sprinkled.
Workshop differences 1
Asai gives a specific 3-day drying period. No explicit drying time is stated in the ChengYan or Tamenuri Studio sources.
For fine powders (300 mesh or finer), a single coat of diluted ki-urushi is sufficient to fix the powder in place. For powders with obvious coarse particles, apply two coats: the first with diluted ki-urushi, and the second with suki-urushi (transparent lacquer). This two-step process ensures coarse particles are securely embedded without shifting. The dilution ratio of the lacquer affects layer thickness; if the layer is thick, one layer may suffice, but for safety, dilute and apply two to three thin layers. Each coat should be allowed to dry before the next is applied. This fixing step is particularly important when the powder is to be polished, as it prevents particles from being dislodged by the abrasion.
When it is rightPowder is firmly adhered to the surface without displacement. The fixing lacquer is clear and does not alter the colour of the metal powder.
When it goes wrongPowder may shift or fall off if not fixed with sufficient lacquer coats, especially for coarse particles. Recovery: re-apply the fixing lacquer and allow it to cure before proceeding.
Workshop differences 3
ChengYan specifies the two-coat method (diluted ki-urushi then suki-urushi) for coarse powders and a single coat of diluted ki-urushi for fine powders.
ChengYan uses two to three layers of diluted suki-urushi as the binder in the coloured-powder method, noting that the dilution ratio affects thickness.
Asai's demonstrations do not show an explicit fixing-lacquer step; the powder is allowed to dry and then polished directly.
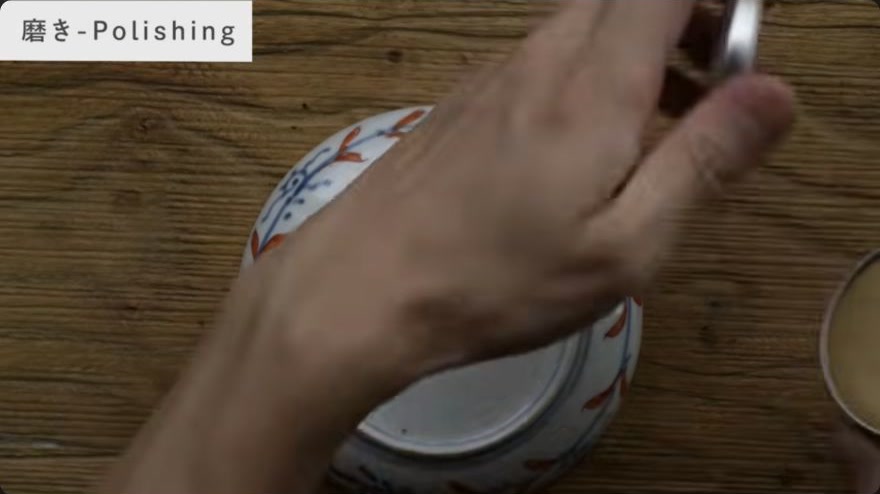
After the fixing lacquer (or the dried maki-e ground) has fully cured, polish the surface to reveal the metallic luster of the powder. ChengYan uses 600-mesh sandpaper for the final polishing pass. Work gently and evenly, following the grain of the surface, to avoid removing powder or creating uneven spots. The unpolished gold looks dull and unappealing; polishing will bring out the metallic sheen and the full colour of the powder. For finer mesh powders (80-mesh and above), polishing is essential to achieve the intended finish; for coarser powders used in decorative techniques like ishi-e, a lighter polish or no polish may be appropriate to preserve the textured surface.
When it is rightA smooth, polished surface with the desired metallic texture and colour. The gold line is sharp, lustrous, and continuous, with no rough or matte patches.
When it goes wrongOver-polishing may remove powder or create uneven surfaces; under-polishing leaves a rough, dull texture. Recovery for over-polishing is difficult—lost powder must be re-applied and re-fixed. Under-polishing can be corrected by a further gentle pass.
Workshop differences 2
Asai refers to the polishing stage as migaki and notes that the unpolished gold looks unappealing and dull but polishing will reveal the metallic luster.
ChengYan specifies 600-mesh sandpaper and notes that the resulting texture varies by powder type: copper bowl powder creates a starry nashiji-like effect, pure silver yields a fine foil texture, fine copper produces a matte metallic effect.
After polishing, the maki-e surface is the finished decorative element. If the piece requires further finishing coats (uwa-nuri), they are applied over the maki-e and the entire surface is polished again to integrate the new coats. Handle the piece gently during the remaining cure period, as the lacquer continues to harden over time. Store the piece in a stable environment away from direct sunlight and extreme humidity. The gold powder, once fully cured and polished, is stable and does not require further treatment, though copper and silver powders may show slight colour shifts over long periods.
Terminology 15 terms
平蒔絵hira-maki-e
flat maki-e; metal powder sprinkled onto a wet lacquer surface and polished to a flat metallic finish
蒔絵maki-e
sprinkled metal-powder decoration in lacquerwork
丸粉marufun
coarser round gold powder, graded by number (No. 1, No. 2, etc.)
消粉keshifun
the finest gold powder, used for the most delicate maki-e work
粉筒funzutsu
tube for sprinkling powder; bamboo or aluminium with a sieve face
毛筆kebo
hair stick or fine brush used to wrap and sprinkle fine maki-e powders
絵漆e-urushi
painting or design lacquer, drawn onto the surface to form the maki-e pattern
生漆ki-urushi
raw unrefined lacquer; a serious skin sensitiser
透漆suki-urushi
transparent lacquer, used as a binder or fixing coat
風呂furo
the humidity-controlled curing cabinet in which lacquerwork is dried
The exact dilution ratio for the ki-urushi and suki-urushi fixing coats is not specified in any source; ChengYan notes that the ratio affects thickness but does not give a figure.
The appropriate furo temperature and humidity for the 3-day drying period are not stated in the Asai sources; this is likely workshop-specific and varies by season.
Whether a fixing-lacquer coat is always required before polishing, or only for coarse powders, is not fully resolved: Asai's demonstrations go directly from drying to polishing, while ChengYan applies explicit fixing coats. The threshold powder size at which fixing becomes necessary is not clearly d
The ChengYan 'flattening' step (pressing powder into the lacquer surface after sprinkling) is not demonstrated in the Asai videos; it may be specific to the coloured-powder method or to coarser powders, but its role in standard hira-maki-e is unclear.
The long-term colour stability of copper and silver powders is noted as a concern by ChengYan, but no data or timeframes are given.
Sources and method notes 6 videos · 4 channels
5 of these 6 videos are cited by a step.
Asai Yasuhiro↗ Production Record: Maki-e and Raden Tall Cup / Couple Sake Set "Crystal" By the Maki-e Artisan: D...
Asai Yasuhiro↗ Lacquer artist Yasuhiro Asai's "Kintsugi Workshop" Part 4 (with subtitles)
chimahaga↗ Kintsugi: Repairing an Antique Imari Plate with a Platinum Marufun Finish | Kintsugi Journal #4 Reviewed, but not cited by a step
Each illustration is a frame from a source video, checked against the step it accompanies. Steps without a verified frame link to the original source.
6 of 7 steps include a verified frame.
The method combines several workshop demonstrations; it is not a settled standard. 1 of the 6 videos listed are not cited by any step. See the 5 unanswered questions.