Fuki-urushi is a wipe-on, wipe-back lacquer finish in which a generous coat of lacquer is laid onto the prepared surface and the bulk is then removed with a cloth, leaving a thin, even film that penetrates the substrate without building a thick raised layer. It sits in the sequence after the ground and middle coats have been sanded flat and dusted, and before any final polishing, additional decorative coats, or delivery. The technique demands a clean workspace, a steady hand for the wipe-back pass, and a controlled humid environment for curing; it is the simplest full-surface lacquer application a beginner can execute and is also used by experienced makers to seal porous filler layers or to lay down a thin tinted film over a prepared ground.
Prerequisites 5 checks before starting
The surface has been sanded flat, free of brush marks, and dusted clean
Ambient temperature is above 20 °C
A humidity-controlled curing space (furo, sealed box with wet towel, or equivalent) is available
Nitrile or latex gloves are at hand for every step that involves touching wet lacquer
The workpiece is stable and can be held or supported without touching the coated face
This procedure involves direct contact with uncured urushi, which is a potent skin sensitiser with a delayed reaction. Work gloved and keep it off skin. Read Safety First before starting.
Raw urushi (ki-urushi) and all lacquer preparations are serious skin sensitisers. Contact with the skin can cause urushi dermatitis, a delayed allergic reaction that may appear 24–72 hours after exposure and can spread. Wear nitrile or latex gloves for every step that involves touching wet lacquer, including cleanup. Wash hands thoroughly with soap and water even when gloves are used, as lacquer c… Incomplete source excerpt; the note ends here.
A sticky, uncured lacquer surface is the most hazardous to touch. Do not handle the workpiece until the cotton-swab test confirms the surface is dry and non-tacky.
Do not inhale lacquer fumes in an unventilated space. Work in a well-ventilated area, especially when using alcohol for cleanup.
If skin contact occurs, wash the area immediately and thoroughly with soap and water. Seek medical attention if a rash develops.
Tools and materials 5 tools · 6 materials
Tools
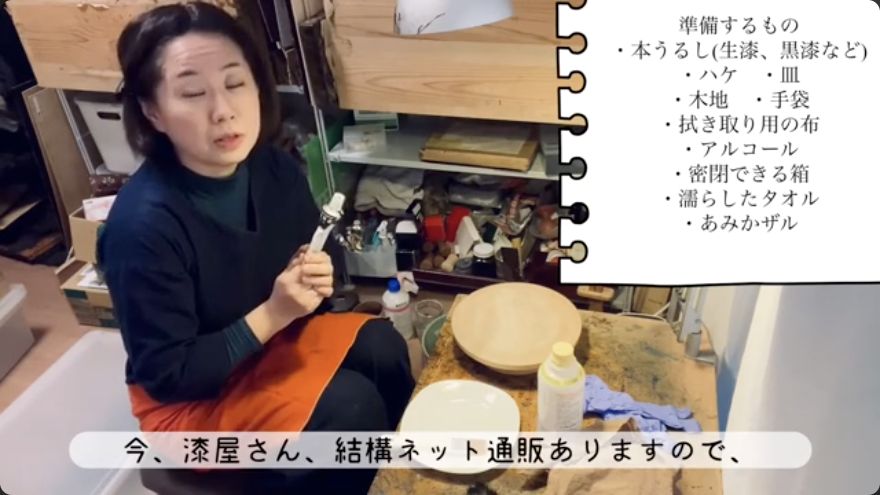
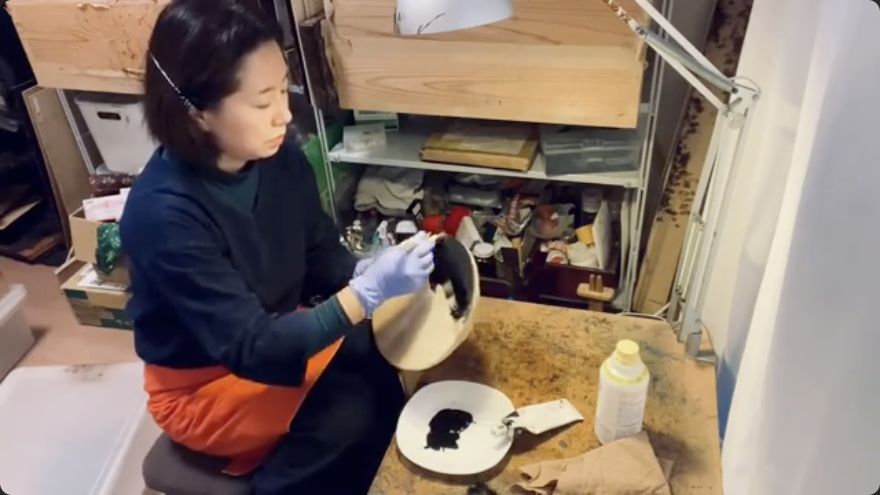
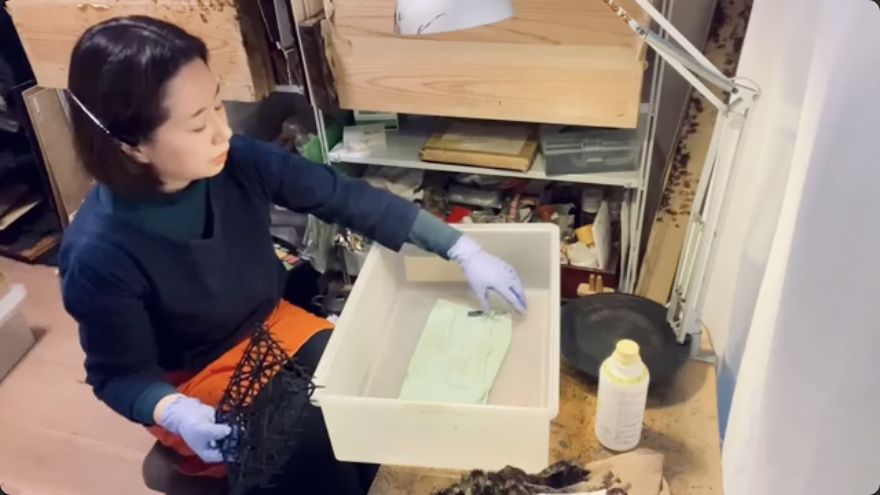
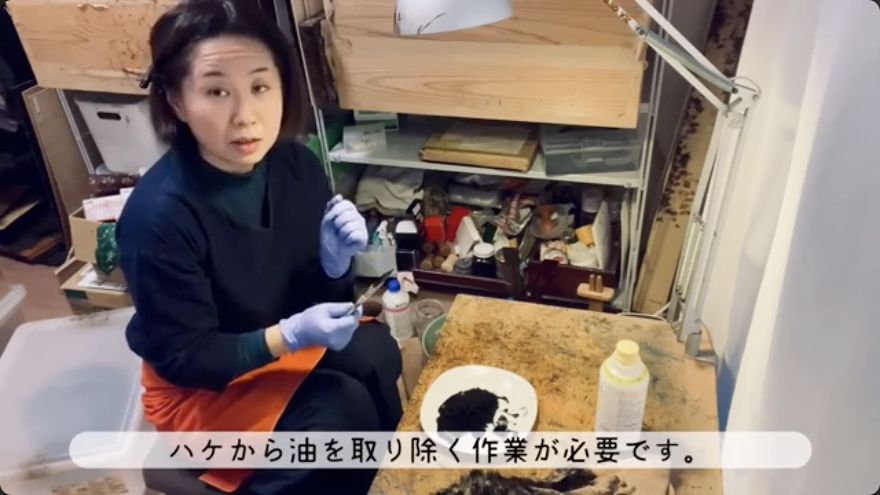
hake (lacquer brush). A soft brush for laying down the lacquer. 松江藩御抱え塗師12代目 小島ゆり↗ notes a 100-yen-shop brush is adequate for beginners. Must be clean and free of residual oil before use.
flat plate or palette. Any flat surface to dispense and hold a working quantity of lacquer.
airtight container. Plastic storage case or cardboard box with a lid, large enough to hold the workpiece above the wet towel.
mesh screen or strainer. Placed over the wet towel so the workpiece is suspended and does not contact the moisture source directly.
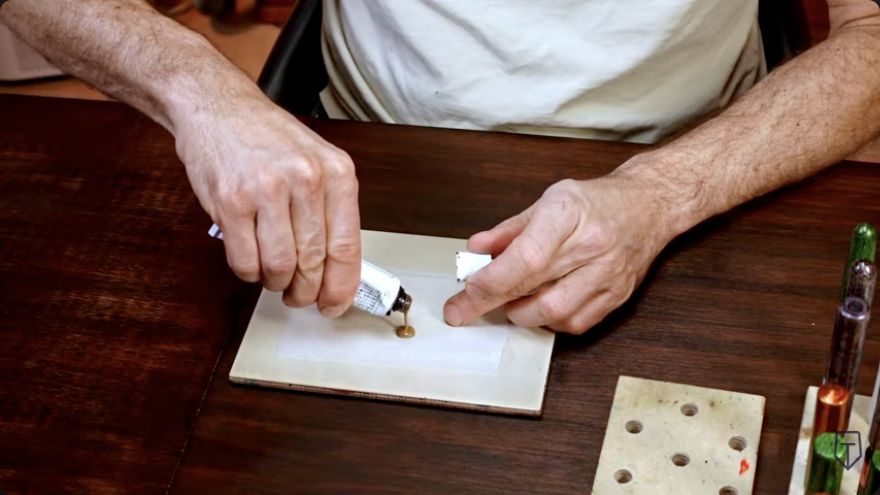
clean spatula. For transferring excess lacquer back to the tube (Tamenuri Studio↗).
Materials
kuro-urushi or ki-urushi. Black lacquer for a dark finish; raw unrefined lacquer for a natural or tinted result. The 松江藩御抱え塗師12代目 小島ゆり↗ demo uses kuro-urushi; 成盐漆作 Lacquer ChengYan↗ uses ki-urushi for sealing a filler.
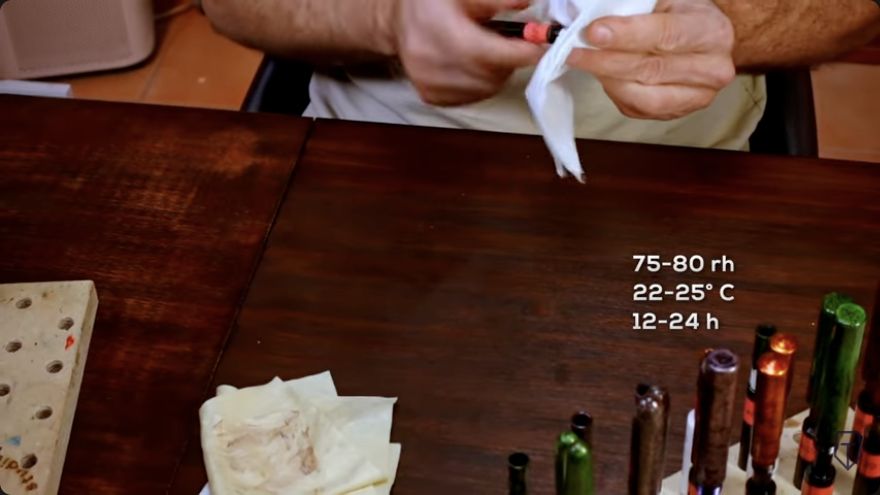
lint-free cloth or paper. Unused, clean cloth or paper for wiping off the excess lacquer. Tamenuri Studio↗ specifies zero-lint non-woven wipes (e.g. Wypall 70, bamboo non-woven).
wet towel. Used to raise humidity inside the curing container. Must not touch the workpiece directly.
disinfectant alcohol. For cleaning tools, plates, and any spilled lacquer from the work surface.
cooking oil. For washing and storing a reusable hake between sessions; must be removed before the next use.
cotton swab. Used to test whether the cured surface is dry and non-tacky.
Lay newspaper or a disposable sheet over the work table to catch spills. Arrange the lacquer tube or bottle, the hake, the flat plate, the wiping cloth, the airtight curing box, the wet towel, the mesh screen, the cotton swab, the disinfectant alcohol, and the gloves within arm's reach. If the hake has been stored in oil, wash the oil off with dish soap or alcohol and let it dry before loading lacquer. Put on gloves before any lacquer is opened. Attach a handle or support to the back of the workpiece if it is a flat plate, so the coated face is never touched by bare fingers.
When it is rightAll items are within reach, the table is protected, the brush is clean, and the workpiece is stable with the coated face unobstructed.
When it goes wrongForgetting gloves or the mesh screen can lead to skin exposure or uneven curing. A brush that still carries oil will prevent the next coat from curing; wash it thoroughly before proceeding.
Workshop differences 1
Tamenuri Studio↗ recommends preparing a tampon-like applicator (lint-free cloth stuffed with cotton, secured with tape) instead of a hake, and notes that gloves are rarely used except for fuki-urushi because they can hinder control.
Squeeze or pour a small working quantity of lacquer onto a pre-cut sheet of Yoshino paper or a clean plate. If the lacquer is from a tube, squeeze a modest amount directly onto the plate; for six small pens Tamenuri Studio↗ notes a small quantity is sufficient. If any impurities or skin are visible, pass the lacquer through the paper to filter it, and transfer any excess back to the tube with a clean spatula to avoid contamination. The lacquer should be smooth, free of particles, and at a consistency that flows off the brush or cloth without running in rivulets.
When it is rightThe lacquer on the plate is smooth, particle-free, and ready to load onto the applicator.
When it goes wrongContaminated or skin-covered lacquer will introduce bumps into the finish. Recover by re-filtering or discarding the affected portion and starting with fresh material.
Workshop differences 1
松江藩御抱え塗師12代目 小島ゆり↗ simply dispenses from the tube onto a plate without a formal filtering step, suitable for a single beginner coat.
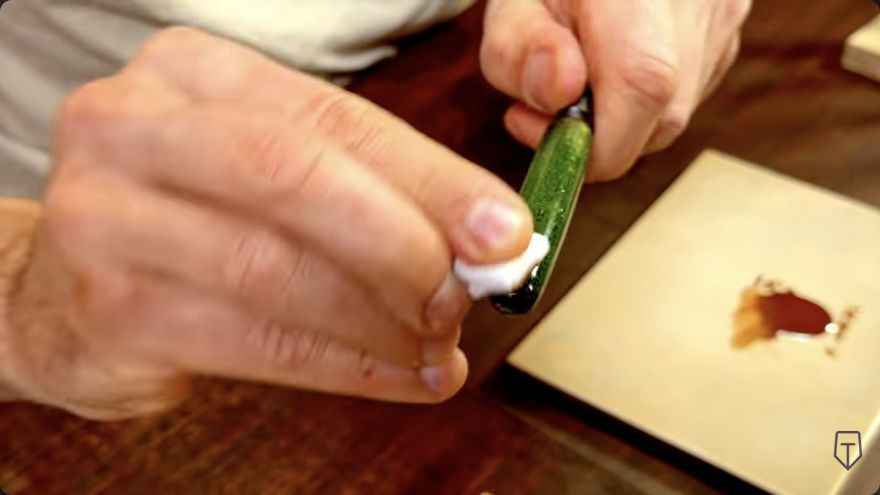
Load the hake generously with lacquer from the plate. With gloved hands, apply the lacquer to the prepared surface in one or a few broad passes, working from the centre outward or along the grain. Because the excess will be wiped off in the next step, neatness of the brushwork is not critical; the goal is to saturate the entire surface so that no bare patches remain. For a small area such as a ceramic repair, brush the lacquer on and allow it a few seconds to seep into the porous filler before wiping (成盐漆作 Lacquer ChengYan↗). For a pen or small object, rub a tiny amount into the surface with the cloth tampon in a circular motion so the lacquer penetrates micro-grooves rather than sitting on top (Tamenuri Studio↗). Cover the edges and rim as well as the flat face.
When it is rightThe surface is fully covered with a wet, glossy layer of lacquer. No dry or bare spots are visible.
When it goes wrongApplying too little lacquer will leave patchy, uneven coverage after the wipe-back. If this happens, re-apply a thin pass before wiping.
Immediately after applying (or after a brief pause of five to ten minutes if the purpose is to let the lacquer seep into a porous filler, as in chimahaga↗), take the clean, unused cloth or lint-free paper and wipe the surface to remove the bulk of the lacquer. Use a light, even sweeping motion; do not scrub or press hard, as this will strip the lacquer entirely and leave bare spots. The aim is to leave a thin, uniform film that has penetrated the top of the substrate. Work the edges and any recesses with a fresh section of cloth or a softer wipe to avoid leaving lint. Check that no colour transfers to the cloth on a final light pass; if it does, wipe once more. The surface should look slightly shiny but still matte under close inspection, indicating a film rather than a pooled coat.
When it is rightA thin, even film of lacquer remains on the wood or substrate. The surface is uniformly glossy without runs, drips, or bare patches. No lint is visible.
When it goes wrongWiping too aggressively removes all lacquer and leaves bare, dry spots. Recover by re-applying a light pass and wiping more gently. Leaving lint on the surface will create a rough finish; wipe again with a clean, lint-free cloth.
Workshop differences 2
松江藩御抱え塗師12代目 小島ゆり↗ wipes immediately after applying. chimahaga↗ waits five to ten minutes before wiping, to allow the mugi-urushi to penetrate the porous filler; wipe until no colour transfers to the tissue.
Tamenuri Studio↗ uses a separate lint-free wipe for the removal pass and cautions against leaving any lint, calling it a common enemy of the finish.
Place the wet towel at the bottom of the airtight container. Lay the mesh screen or strainer on top of the towel so the workpiece is suspended above the moisture source and does not touch the wet fabric directly. Set the lacquered piece on the mesh, coated face up. Close the lid to trap the humidity. The target conditions are above 20 °C and at least 50 % relative humidity, ideally around 80 % (松江藩御抱え塗師12代目 小島ゆり↗). Tamenuri Studio↗ specifies 20–24 °C at 80 % RH. If the ambient room is cooler or drier, the sealed box with the wet towel compensates. Do not place the piece in direct sunlight or near a heat source.
When it is rightThe piece is suspended above the moisture source inside a sealed, humid space. The lid is closed and no condensation is dripping onto the workpiece.
When it goes wrongDirect contact with the wet towel can cause the lacquer to cure too quickly or unevenly, producing a soft or blotchy surface. If the box is too small and the towel touches the piece, add a second layer of mesh or raise the piece.
Workshop differences 1
Tamenuri Studio↗ gives a tighter range: 20–24 °C at 80 % RH, and notes that lighter colours or diluted layers require lower humidity and a longer cure (38 hours vs 24).
Leave the piece in the humid box for at least one night under standard conditions. In winter or cooler environments, extend the cure to two to three days or up to a week (松江藩御抱え塗師12代目 小島ゆり↗). Tamenuri Studio↗ specifies approximately 24 hours at 80 % RH and 20–24 °C for a standard coat, extending to 38 hours for lighter colours or diluted layers. After the minimum time, open the box and test the surface with a cotton swab: press it gently against the lacquered area. If no colour transfers to the swab and the surface feels dry and firm, the coat has cured. If the swab picks up colour or the surface feels sticky, the lacquer is not yet set; return the piece to the box and check again later. A sticky surface is also a skin-sensitiser hazard, so do not handle it without gloves.
When it is rightThe surface is dry to the touch, does not transfer colour to the cotton swab, and feels firm under light pressure.
When it goes wrongHandling a sticky, uncured surface can cause urushi dermatitis and will smear or damage the finish. If the surface is still tacky, extend the cure time and re-test.
Workshop differences 1
Tamenuri Studio↗ differentiates cure time by colour and dilution: 24 hours for standard, 38 hours for lighter or diluted layers.
Wipe the plate, the hake, and any lacquer drips from the table with a tissue dampened with disinfectant alcohol. If the hake is to be reused, wash it with cooking oil to dissolve the dried lacquer, then remove the oil with dish soap or alcohol before the next session; residual oil will prevent the next coat from curing. For disposable brushes, discard them. Wipe the mesh screen and the inside of the curing box with alcohol. Discard the newspaper if it is soiled with lacquer. Wash hands thoroughly with soap and water, even if gloves were worn, as lacquer can seep past the cuff.
When it is rightAll tools, surfaces, and the work area are free of residual lacquer. The brush is either stored in oil (for reuse) or discarded.
When it goes wrongLeaving oil on the brush will prevent the next coat of lacquer from curing. Leaving lacquer on the table or tools will dry and contaminate the next session's materials.
Once the fuki-urushi coat is fully cured and verified dry, the piece is ready for the next stage of the sequence. If further coats are planned, dust the surface with a clean brush before applying the next layer. If the fuki-urushi is the final coat (nuritate, a finish left unpolished), the piece is complete and should be stored in a stable, moderate-humidity environment away from direct sunlight. If a mirror polish (roiro) or additional decorative layer is to follow, the cured fuki-urushi surface serves as the base for sanding, polishing, or powder application. Between coats, the piece should rest in a humid location for at least one day to ensure full hardening before any abrasive work begins.
Terminology 8 terms
拭き漆fuki-urushi
Wipe-on wipe-back lacquer finish: lacquer applied and then the excess wiped off, leaving a thin film
The sources do not specify a recommended number of fuki-urushi coats for a given substrate thickness; the 松江藩御抱え塗師12代目 小島ゆり↗ video demonstrates a single coat, while 松江藩御抱え塗師12代目 小島ゆり↗ shows a fourth brush coat (hake-nuri, not fuki-urushi). The appropriate number of fuki-urushi passes for a given project is not ad
Tamenuri Studio↗ uses the term 'uwazuri' for its wipe-on technique on pens, which is closely related to but terminologically distinct from fuki-urushi. The precise boundary between the two terms in workshop practice is not clarified in the sources.
The sources do not address how fuki-urushi behaves on non-porous substrates (ceramic, metal) versus porous wood; 成盐漆作 Lacquer ChengYan↗ applies it to a ceramic repair but does not discuss adhesion differences in detail.
No source specifies a maximum film thickness or a minimum for the fuki-urushi layer; the guidance is qualitative ('thin, even film') rather than metric.
松江藩御抱え塗師12代目 小島ゆり↗ Finished! Day 7: Brush painting and mirror polishing "Polished to a shine" (Lacquer painting clas... Reviewed, but not cited by a step
松江藩御抱え塗師12代目 小島ゆり↗ Day6 刷毛塗り&鏡面磨き「ひたすら磨く」(初心者向けうるし塗り教室) Reviewed, but not cited by a step
松江藩御抱え塗師12代目 小島ゆり↗ Day5 刷毛塗り&鏡面磨き「ひたすら研ぐ」(初心者向けうるし塗り教室) Reviewed, but not cited by a step
chimahaga↗ Kintsugi: Repairing an Antique Imari Plate with a Platinum Marufun Finish | Kintsugi Journal #4
Tamenuri Studio↗ How Do Urushi Pens Get So Glossy? - Uwazuri part 1
Each illustration is a frame from a source video, checked against the step it accompanies. Steps without a verified frame link to the original source.
7 of 7 steps include a verified frame.
The method combines several workshop demonstrations; it is not a settled standard. 3 of the 8 videos listed are not cited by any step. See the 4 unanswered questions.