This video demonstrates the sharpening of two specific lacquer craft knives: the yoko-te-to (side-handled knife) and the nuri-to (lacquer-applying knife). It is useful for lacquer artisans who need to maintain single-bevel tools for precise work. The procedure covers whetstone preparation, the sequence of grits, and a unique leveling technique using an iron needle and hammer.
A walkthrough written from 成盐漆作 Lacquer ChengYan’s video ↗.
The recording is the authoritative demonstration; this page is a working guide to it.
Be careful when grinding off sharp edges on the sides of the whetstones, as cuts from whetstones are more painful and take longer to recover from than general knife cuts.
Read Safety First before working with raw urushi.
Tools shown
Whetstones— Artificial stones, must be flattened before use
Iron needle and hammer— For checking and correcting blade flatness
Materials
yoko-te-to— Side-handled knife used for brush development
nuri-to— Lacquer-applying knife
1000-grit whetstone— Two stones, used for initial sharpening and flattening
8000-grit whetstone— Highest grit used, for final finishing
Diamond whetstone— 400-grit on one side, 1000-grit on the other, for correcting nicks
Iron needle— Used for tapping the blade edge
Small hammer— Used to tap the iron needle
Conditions
notes — The video emphasizes the importance of patience and control in sharpening knives. The process can take 5-10 years to master.
The method
Section by section.
Each heading links back to the moment in the source video where it begins.
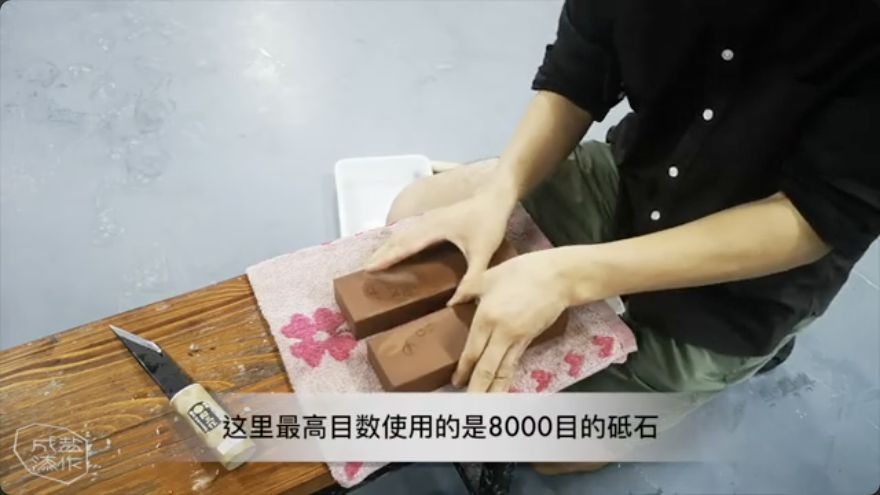
Before sharpening, flatten the whetstones to ensure the blade is sharpened flat. Rub two whetstones together, pressing the front, middle, and back with both hands. Apply force evenly, adjusting hand pressure based on handedness to balance the force. Rotate the stones 180 degrees repeatedly to feel for resistance. If possible, use three stones to flatten each other (A flattens B, C flattens B, A flattens C) to achieve a higher level of flatness. Grind off any sharp edges created on the sides of the stones to prevent cuts.
When it is rightThe whetstone surface is level, with no concave or convex areas, and no sharp edges on the sides.
When it goes wrongUneven flattening leads to an uneven blade edge. Recovery involves re-flattening the stones using the three-stone method.
Begin by verifying the flatness of the blade on a new knife or one exhibiting nicks and chips. Should significant correction be required, perform cold sharpening by using the 400-grit side of the diamond whetstone. This technique, while time-consuming, allows for greater control over the force applied than a grinding wheel, which is difficult to manage and generates sparks. For the initial correction stage, the 1000-grit surface of the diamond whetstone is employed because it is significantly coarser than the 1000-grit equivalent found on a natural whetstone.
When it is rightNicks and chips are removed, and the blade is prepared for finer sharpening.
When it goes wrongUsing a grinding wheel can damage the blade due to uncontrolled force and heat. Recovery involves careful re-sharpening with whetstones.
Once the whetstones have been flattened, wash them thoroughly and retrieve the knife. Since lacquer craft knives typically feature a single bevel, honing is confined to one face, which must be perfectly flat. To establish the correct angle, mark a guideline on the blade and maintain that position while moving the tool in a front-to-back motion. As you work, iron is released, forming a slurry; a darker hue indicates that this abrasive mixture is being generated effectively. Because the slurry itself provides the cutting action, avoid introducing excess water. Continue the process for roughly 5 to 6 minutes.
When it is rightThe blade edge is sharpened, with a consistent slurry color indicating good grinding.
When it goes wrongAdding too much water reduces the grinding effect of the slurry. Recovery involves continuing to sharpen until the slurry color is consistent.
Once sharpening is complete, rest the knife's edge against an iron needle and strike it with a small hammer. This procedure aims to achieve a state as near to perfect flatness as possible. Apply force uniformly from the interior toward the exterior. By listening to the resulting tones, one can distinguish between uneven and even sections, as they resonate differently. Keep tapping until the sound becomes uniform along the entire blade edge.
When it is rightThe blade edge is level, with a consistent sound when tapped with the iron needle and hammer.
When it goes wrongUneven tapping leads to an uneven blade edge. Recovery involves re-tapping until the sound is consistent.
Once the blade has been leveled by tapping, remove the resulting marks using the 400-grit diamond whetstone. The blade is then moved to the 1000-grit diamond whetstone, where sharpening continues. Following this stage, the process shifts to the 8000-grit whetstone for a final sharpening pass, thereby completing the knife sharpening procedure.
When it is rightThe blade is refined and polished, with a sharp and level edge.
When it goes wrongSkipping the diamond whetstone step leaves tapping marks on the blade. Recovery involves re-sharpening with the diamond whetstone.
When the whetstones are not being used, dry them and coat the surface with vegetable oil, then store them appropriately to avoid damage. To sharpen, position the 1000-grit whetstone against the 8000-grit whetstone, securing the front, middle, and back three points. Once the whetstone has been flattened, tidy the workspace by cleaning and organizing the desktop.
When it is rightThe whetstones are dry, oiled, and stored safely, ready for future use.
When it goes wrongStoring whetstones without oil can cause them to dry out and crack. Recovery involves re-oiling and storing them properly.
Terminology in this video
横手刀yoko-te-to
Side-handled knife
塗刀nuri-to
Lacquer-applying knife
冷研ぎreiyagi
Sharpening with a diamond whetstone
Left open
What this video does not settle.
The exact amount of water to use during sharpening is not specified, only that it should not be too much.
The specific type of vegetable oil to use for storing whetstones is not mentioned.