“Kintsugi - Connecting people to people through urushi” by Irahara Mitsumi "漆で繋がる日本の金繕い" いらはらみつみ
This video demonstrates the initial stages of kintsugi repair on a chipped tea bowl, focusing on preparing the substrate and mixing the clay-lacquer fillers. It is useful for practitioners seeking a detailed breakdown of the 'kake' (filling) and 'koshi' (grounding) steps before the final gold application.
Raw urushi (ki-urushi) causes serious delayed skin reactions. The video shows direct handling with cotton swabs and spatulas, but no protective gloves are mentioned or shown. Practitioners should take appropriate precautions to avoid skin contact.
Read Safety First before working with raw urushi.
Tools shown
cotton swab— Used to apply the initial thin layer of lacquer.
tissue— Folded and pressed to wipe off excess lacquer and absorb water from clay mixes.
hera— Spatula used for mixing clay and lacquer; shape is modified to fit the vessel.
rotary cutter— Used to trim dried clay fillers to match the vessel's curve.
Materials
ki-urushi— Raw lacquer, described as having antibacterial properties; used for the initial wipe and as the binder for the clay.
tonoko— Fine polishing clay powder; mixed with water and lacquer.
jinoko— Fired clay powder; mixed with water and lacquer.
tsubaki— A plant fiber used as an abrasive on sandpaper.
Conditions
temperature — room temperature
cure time — 1 day for water-based clay mix
notes — The video mentions that the clay mix dries in one day at room temperature due to the water content.
The method
Section by section.
Each heading links back to the moment in the source video where it begins.
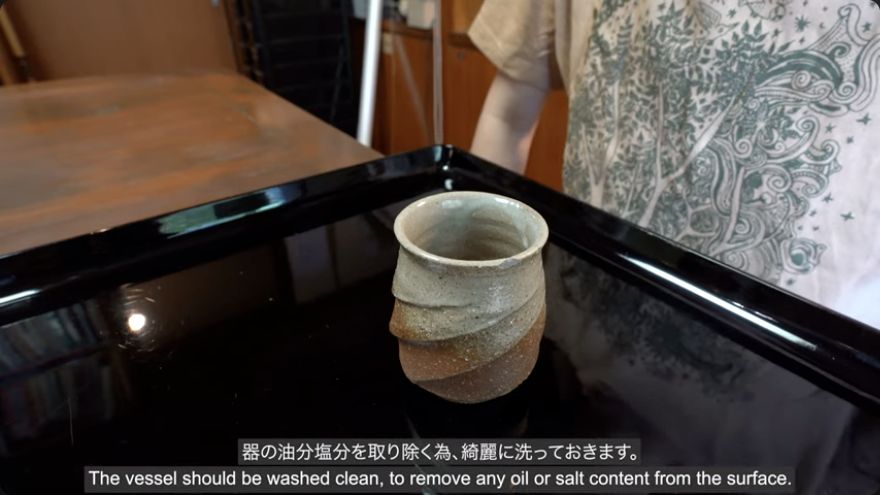
Begin with a chipped tea bowl. Wash the vessel thoroughly to remove oils and salts, which are essential for the lacquer to adhere properly. The speaker notes that this step is critical for the longevity of the repair. The vessel is then ready for the initial lacquer application.
When it is rightThe surface is clean and free of contaminants that would prevent adhesion.
When it goes wrongResidual oils or salts will cause the lacquer to peel or fail to bond.
Use ki-urushi (raw lacquer) to create a thin surface layer. The video shows this being applied using a cotton swab to control the amount. After application, immediately wipe away the excess lacquer using a folded piece of tissue, pressing gently to absorb the surplus without removing the thin film that remains.
When it is rightA thin, even film of lacquer remains on the surface, ready to bond with the clay filler.
When it goes wrongApplying too much lacquer or wiping too aggressively can remove the necessary bonding layer.
Select tonoko (fine clay) and jinoko (coarser clay) based on the depth of the chip. Mix the clay with a small amount of water first. If the mixture is too wet, press it with tissue to absorb excess moisture. Then, add a slightly smaller amount of ki-urushi to the clay and mix thoroughly. Scrape all lacquer from the spatula to avoid waste. Wrap the mixture in plastic to prevent it from drying out and to remove air bubbles.
When it is rightA smooth, consistent paste that holds its shape without being too wet or dry.
When it goes wrongToo much water makes the mixture weak; too much lacquer makes it difficult to work with.
Prepare a sandpaper loaded with tsubaki (plant fiber) to abrade the surface. This step is used to roughen areas that have been pressed or to improve adhesion for the next layer. After sanding, carefully wipe away all sanding dust to ensure a clean surface for the clay application.
When it is rightThe surface is uniformly roughened and free of dust, ready for the clay filler.
When it goes wrongLeaving dust on the surface will create a weak bond between layers.
Apply the coarser jinoko mix first, followed by the finer tonoko mix. Use a spatula that has been modified to fit the curve of the vessel. The mixture, which contains water, dries at room temperature within one day. Once the tonoko layer is dry, it can be trimmed to match the vessel's shape using a rotary cutter. Repeat the filling, sanding, and trimming process until the desired shape is achieved.
When it is rightThe chip is filled with a smooth, level surface that matches the vessel's contour.
When it goes wrongUneven filling or poor trimming will result in a visible step or gap in the final repair.
Terminology in this video
金継ぎkintsugi
Lacquer repair finished in gold
生漆ki-urushi
Raw unrefined lacquer
砥の粉tonoko
Fine polishing-clay powder
地の粉jinoko
Fired-clay powder for the ground
トクサtsubaki
Plant fiber used as an abrasive
Left open
What this video does not settle.
The exact ratio of clay to lacquer is not specified, only that lacquer is 'slightly less' than the clay.
The specific type of tsubaki or how it is applied to the sandpaper is not detailed.