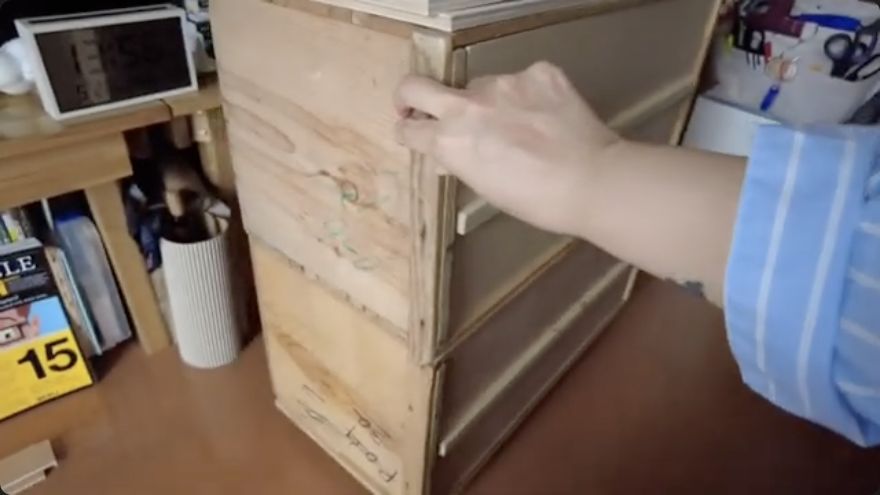
How to make your own Muro (A curing box for urushi lacquer and kintsugi craft).
This video demonstrates how to construct a small, home-scale curing chamber (muro) for urushi lacquer and kintsugi work using repurposed apple boxes. It is useful for hobbyists who need a controlled, dust-free environment to cure lacquer without building a professional cabinet.
A walkthrough written from Goenne Japan Kintsugi’s video ↗.
The recording is the authoritative demonstration; this page is a working guide to it.
Ensure the chamber is well-ventilated to the room to prevent the buildup of any fumes, although urushi is not volatile like chemical solvents.
Read Safety First before working with raw urushi.
Tools shown
Castors— Attached to base for mobility
Thermometer/Hygrometer— To monitor conditions
Materials
Apple boxes— Japanese-style, used as the main structure
Wood inserts— Fitted to four sides and back
Water— Placed in a bowl or on wet cloth
Wood sticks— Used for shelving and propping pieces
Foam and toothpicks— For propping small items
Conditions
temperature — 20-27°C
humidity — 70%
notes — Chamber must not be airtight; oxygen is required for curing.
The method
Section by section.
Each heading links back to the moment in the source video where it begins.
The primary goal is to create a controlled environment with specific temperature and humidity levels for urushi to cure. A secondary, critical objective is to maintain a dust-free space, as lacquer surfaces are highly sensitive to particulates. Unlike a refrigerator, the chamber does not need to be airtight because urushi is an organic material that requires oxygen for its enzymatic curing process.
When it is rightA space that maintains stable humidity and temperature while remaining breathable and dust-free.
When it goes wrongCreating an airtight seal, which prevents the necessary oxygen exchange for curing.
Japanese apple boxes are highlighted as an ideal size for home kintsugi work. The creator attaches castors to the base to allow for mobility and stacking. The preferred orientation is front-loading, which provides better visibility and easier access compared to top-loading plastic bins or cardboard boxes. This setup can also function as a piece of furniture, such as a TV stand, if stable.
When it is rightA stable, mobile, front-loading box that is easy to load and unload.
When it goes wrongUsing a top-loading container that makes it difficult to see or reach items inside.
Wooden inserts are added to the four sides and the back of the box. This modification creates a more structured interior and provides surfaces for mounting shelves or hooks. The transcript contains a significant amount of repetitive noise regarding this step, but the visual intent is to line the interior to create a finished, functional chamber.
When it is rightA lined interior that supports shelving and provides a clean surface for the curing environment.
When it goes wrongLeaving the box unlined, which may not provide adequate support for shelves or hooks.
The creator monitors the chamber, noting a temperature range of 20 to 27 degrees and a humidity level of approximately 70%, which is described as perfect for curing. A bowl of water is placed inside to maintain this humidity. The chamber is not airtight, allowing for the necessary air exchange for the lacquer's enzymatic activity.
When it is rightStable readings of 20-27°C and ~70% humidity.
When it goes wrongHumidity dropping too low, which can cause the lacquer to dry unevenly or not cure properly.
Traditional muro designs feature removable shelves. This allows for flexibility when curing taller pieces like vases or large bowls. The shelves are supported by sticks, which also facilitate easy loading and unloading. For small items like sake cups, multiple pieces can be loaded onto a single stick for efficient movement in and out of the chamber.
When it is rightShelves that can be easily removed to accommodate varying piece heights.
When it goes wrongFixed shelving that prevents the curing of taller items.
Wood sticks are used to prop up pieces that have freshly lacquered edges or surfaces that must not touch anything. This is particularly important for thin items where the edge is close to the bottom. For very small parts or jewelry, foam and toothpicks can be used to create a stable, non-contact support structure.
When it is rightPieces are elevated so that no wet lacquer surface touches the shelf or other objects.
When it goes wrongPieces touching the shelf, which can cause the lacquer to stick or become damaged.
Having two units is beneficial for high-volume work. The primary unit is used for active curing with controlled humidity and temperature. The second unit can serve as storage for pieces that are already cured or waiting for the next step. If a large project requires more curing space, the second unit can be converted into a functional muro by adding water and a thermometer.
When it is rightA workflow where one unit cures and the other stores, or both can cure if needed.
When it goes wrongRunning out of space in a single unit, forcing pieces to be removed before they are fully cured.
If a bowl of water is not preferred, a wet cloth or towel can be hung on a stick at the back of the chamber. This method is more space-efficient. To increase moisture, the cloth can be removed, sprayed with water, and re-hung. This allows for dynamic adjustment of the chamber's humidity levels without taking up shelf space.
When it is rightA space-saving method to maintain humidity that allows for easy adjustment.
When it goes wrongThe cloth drying out too quickly, requiring frequent re-wetting.
Terminology in this video
室muro
A curing chamber for lacquer
風呂ofuro
Bathroom; used as a metaphor for the warm, humid environment
Left open
What this video does not settle.
The exact dimensions of the apple boxes are not specified.
The specific type of wood used for the inserts is not mentioned.