"Vibrant Myanmar Lacquer Craft - Coating, Kanyit and Shwezawa" by U Maung Maung 灼爍たるミャンマー漆芸ー塗り・蒟醤・箔絵
This video provides a comprehensive overview of traditional Myanmar lacquerware production, covering substrate preparation, the multi-layered black body coating process, and two distinct decorative techniques: Kanyit (engraved and colored) and Shwezawa (gold leaf). It is useful for understanding the sequential workflow, material composition, and specific drying conditions required for this craft.
Raw urushi (tisi) causes serious delayed skin reactions. Avoid direct skin contact during application and handling.
Read Safety First before working with raw urushi.
Tools shown
special knife— Used for scraping and smoothing surfaces
engraving tools— For freehand or stencil patterns
cotton cloth— For wiping and polishing
stone— For grinding charcoal and petrified wood
Materials
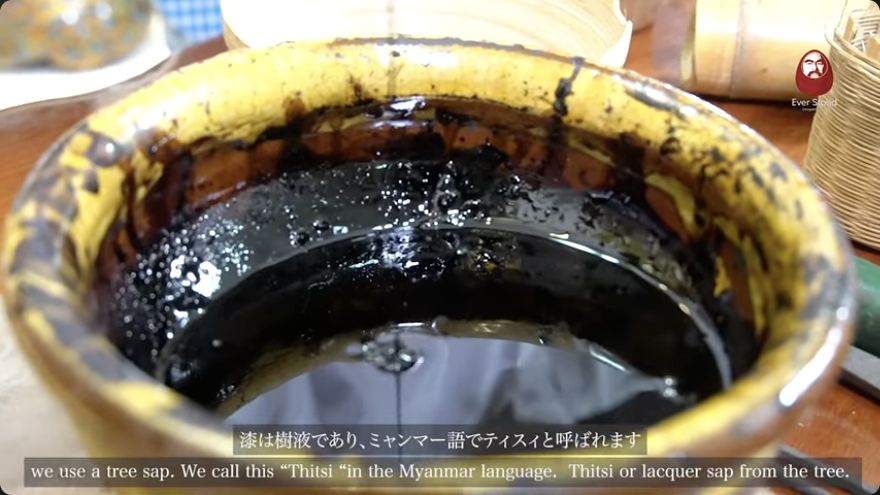
tisi (lacquer sap)— Raw sap from Melanuria usitata, oxidizes to black
bone ash— Mixed with lacquer for putty layers
clay— River or island clay mixed with lacquer for putty
cinnabar— Purified red pigment
acacia resin— Transparent protective layer
charcoal— Deep wood charcoal for polishing paste
petrified wood— Ground to fine powder for dry polishing
yellow salt powder— Mixed with neem tree glue for Shwezawa resist
gold leaf— Applied for Shwezawa decoration
Conditions
temperature — 30°C
humidity — 60-70%
cure time — 5-7 days per layer
notes — Drying occurs in an underground cellar.
The method
Section by section.
Each heading links back to the moment in the source video where it begins.
Apply raw tisi sap to the entire surface of the bamboo, wood, or horsehair substrate. Allow each layer to dry in an underground cellar with humidity of 60-70% and temperature around 30°C for 5-7 days. After the first layer dries, scrape the surface smooth with a special knife to ensure stability before applying the next layer.
When it is rightThe substrate becomes stronger and more stable, with a smooth surface ready for the next coat.
When it goes wrongIf the surface is not scraped smooth, subsequent layers may not adhere evenly, leading to an uneven finish.
Mix bone ash, clay, or roots with tisi to create a putty. Apply this putty to the surface, followed by a layer of pure tisi. Repeat this process, using sandpaper and water to smooth the surface between layers. Continue applying pure tisi layers until a total of 20 or more layers are achieved for a high-quality black body.
When it is rightA smooth, hard, and uniform black surface that is resistant and strong.
When it goes wrongInsufficient layers or improper smoothing can result in a weak or uneven surface that is prone to damage.
Use special tools to engrave patterns onto the black lacquer surface. Male artists typically engrave the outline patterns, while female artists add finer details. This can be done freehand or with a stencil. The engraving creates the areas where colors will later be applied.
When it is rightClear, detailed patterns engraved into the black lacquer surface.
When it goes wrongInconsistent engraving depth can lead to uneven color application and a less defined final design.
Mix purified cinnabar with tisi to create a red color. Apply this red color over the entire surface, including the engraved patterns. Allow it to dry for 5-7 days. Then, use a charcoal paste made from deep wood charcoal and water, applied with a cotton cloth, to gently rub and clean the surface. This removes the red color from the unengraved black areas, leaving it only in the engraved lines.
When it is rightRed color remains only in the engraved patterns, creating a sharp contrast with the black background.
When it goes wrongIf the cleaning is too aggressive, the red color may be removed from the engraved lines, resulting in a faint or incomplete design.
Apply a transparent layer of acacia resin over the entire surface to protect the red color. After drying, female artists engrave additional details in the black areas. Apply a very thin layer of tisi, wipe it off, and then apply green color powder (mixed from indigo and sulphur) over the surface. The tisi in the engraved areas absorbs the green powder. Dry for about a week, then wash off the excess green color with water and cotton, leaving it only in the engraved lines.
When it is rightGreen color appears only in the newly engraved details, adding depth to the design.
When it goes wrongIf the tisi layer is not thin enough, the green color may not adhere properly to the engraved lines.
Repeat the process of applying acacia resin, engraving new details, applying thin tisi, and then applying yellow color powder. Dry and wash off the excess yellow color, leaving it only in the engraved lines. This results in a three-color design of red, green, and yellow. For a four-color design, mix red and yellow to create orange.
When it is rightA vibrant, multi-colored design with red, green, and yellow (or orange) details on a black background.
When it goes wrongInconsistent application of colors can lead to a muddled or uneven appearance in the final design.
Grind deep wood charcoal with water on a stone to make a paste. Gently rub this paste over the surface with a cotton cloth. After cleaning with water, grind petrified wood into a very fine powder and rub it dry onto the surface with the hand. Finally, rub the surface with the skin of the hand or arm until it produces a squeaky sound, indicating the polish is complete.
When it is rightA highly shiny, smooth surface that feels polished and produces a squeaky sound when rubbed.
When it goes wrongUsing coarse powder can scratch the surface, ruining the polish and the underlying colors.
Mix yellow salt powder with neem tree glue to create a yellow ink. Draw the desired pattern with a pen. Paint additional yellow ink over areas where gold leaf is not wanted. Apply very thin layers of tisi over the entire surface and wipe it off with fine cotton. Apply gold leaf to the surface. After a few hours, gently wash the surface with river water and cotton to remove the gold leaf from the yellow ink areas, leaving it only on the black lacquer.
When it is rightGold leaf adheres only to the black lacquer areas, creating a black and gold design.
When it goes wrongUsing groundwater instead of river water can cause the gold leaf to lift or not adhere properly.
Terminology in this video
တစ်စီtisi
Myanmar term for lacquer sap
ကညစ်kanyit
Myanmar technique of engraved and colored lacquer
ရွှေဇဝါshwezawa
Myanmar technique of gold leaf lacquer
Left open
What this video does not settle.
The exact composition of the 'yellow salt powder' used in Shwezawa is not specified.
The specific type of neem tree glue used is not detailed.
The precise method for purifying cinnabar is not described.