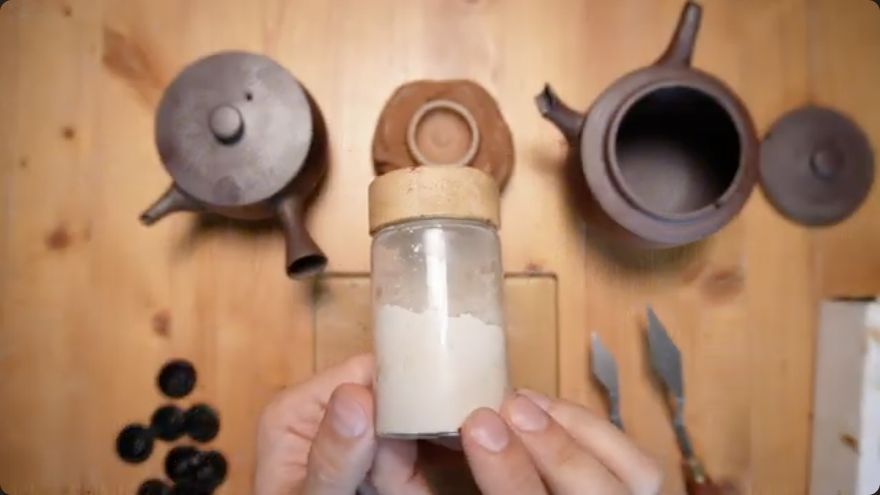
Кинцуги видео уроки. Наращиваем недостающий фрагмент. Маска для шва
This video demonstrates the intermediate stage of kintsugi repair: building up missing ceramic fragments and filling seams using a mixture of fine ceramic powder and raw lacquer. It is useful for practitioners who have completed the initial gluing and ground coat stages and need to restore volume before final polishing.
A walkthrough written from Kintsugi by Dmitry Bykov’s video ↗.
The recording is the authoritative demonstration; this page is a working guide to it.
Raw lacquer (ki-urushi) is toxic and causes serious delayed skin reactions. The video explicitly shows the maker wearing gloves and finger cots and advises viewers to do the same.
Read Safety First before working with raw urushi.
Tools shown
fingers— Used for applying and shaping the mixture
knife— Used to lift and remove the dried masking film
gloves/finger cots— Protective gear for handling raw lacquer
Materials
fine ceramic powder— Used for building up volume; described as fine-dispersed
ki-urushi (raw lacquer)— Mixed with powder without water; toxic
masking fluid— Watercolor masking liquid used to protect adjacent surfaces
adhesive tape— Used as a temporary backing for large missing fragments
Conditions
cure time — several days to a week
notes — Curing takes place in a drying cabinet (furo).
The method
Section by section.
Each heading links back to the moment in the source video where it begins.
Combine fine ceramic powder with raw lacquer to create a paste. The maker notes that the initial mix was too liquid and adds more powder to achieve a semi-thick, delicate consistency suitable for building up volume. The mixture is prepared in small batches to manage workability.
When it is rightA uniform, semi-thick paste that holds its shape but can be smoothed by hand.
When it goes wrongIf the mix is too liquid, it will run or not hold volume; add more powder. If too dry, it becomes difficult to apply; add a small amount of lacquer.
Apply the soft mixture directly into small missing chips and depressions using fingers. Rub the material into the base to ensure all small voids are filled. For areas with significant missing volume, a backing made from adhesive tape is applied to the inside to support the new material, ensuring the tape does not touch the sticky side of the lacquer mixture.
When it is rightThe chip area is filled flush with the surrounding surface, with no gaps or voids.
When it goes wrongIf the backing is not secure, the new material may detach during drying. Ensure the tape backing is firmly attached to the interior surface.
For filling long seams, apply watercolor masking fluid along the edges of the seam to protect the surrounding clay surface. The fluid is applied close to the line but not into it. Once dried, it forms a thin, translucent film that acts as a barrier. This allows the ceramic-lacquer mixture to be applied generously over the seam without dirtying the adjacent surfaces.
When it is rightA continuous, thin film of masking fluid borders the seam, clearly visible in light, protecting the adjacent clay.
When it goes wrongIf the masking fluid is applied into the seam, it will interfere with the lacquer bond. If it is too far from the seam, it will not protect the adjacent surface effectively.
Place the repaired objects in a drying cabinet (furo) to allow the lacquer to cure. The maker notes that the process takes several days to a week. After curing, the material will have hardened, and any necessary adjustments or additional filling can be made in a subsequent session.
When it is rightThe filled areas are hard and stable, ready for the next stage of polishing or further filling.
When it goes wrongIf the lacquer is not fully cured, it may remain tacky or soft, leading to damage during subsequent handling.
Apply the ceramic-lacquer mixture over the masked seam, filling the gap completely. Once the mixture has set slightly, use a knife to gently lift the edge of the dried masking fluid film. Peel the film away, which removes any excess filler that has spread onto the adjacent surfaces. This leaves a clean, sharp edge to the filled seam.
When it is rightThe seam is filled flush, and the adjacent surfaces are clean, with no residue of the filler mixture.
When it goes wrongIf the masking film is removed before the filler has set, it may pull out some of the filler. If the film is too thick, it may be difficult to remove cleanly.
Terminology in this video
金継ぎkintsugi
lacquer repair finished in gold
生漆ki-urushi
raw unrefined lacquer
風呂furo
the humidity-controlled curing cabinet
Left open
What this video does not settle.
The specific type of ceramic powder used is not named, only described as 'fine-dispersed' and 'ceramic'.
The exact duration of the masking fluid drying time before application of the filler is not specified, only 'a short time'.
The specific humidity and temperature settings of the drying cabinet are not provided.