How Do Urushi Pens Get So Glossy? - Uwazuri part 1
This video demonstrates the 'uwazuri' (wipe-on) technique for achieving high-gloss finishes on urushi-coated pens. It is useful for intermediate lacquer artists who have completed the initial sanding and polishing stages and wish to learn how to fill micro-grooves with ultra-thin layers of high-quality lacquer to enhance gloss and seal the surface.
A walkthrough written from Tamenuri Studio’s video ↗.
The recording is the authoritative demonstration; this page is a working guide to it.
Raw urushi can cause serious delayed skin reactions. Avoid prolonged skin contact and wash hands thoroughly after handling. The maker notes that lacquer under fingernails is difficult to remove and can be harmful.
Read Safety First before working with raw urushi.
Tools shown
Spatula— Clean spatula for transferring excess lacquer back to the tube
Tape— Used to secure the lint-free cloth into a tampon-like applicator
Sanding blocks and powders— For the preceding dozuri stage, up to 5,000–10,000 grit
Materials
Isehaya urushi— High-quality raw lacquer; alternatives include roiro Isehaya, uwazuri urushi, kijomi urushi, or fresh raw urushi for practice
Yoshino paper— Pre-cut sheets used for filtering lacquer
Lint-free cloth— Non-woven, zero-lint wipes (e.g., Wypall 70, bamboo non-woven, or Kleenex) for applying and wiping off lacquer
Turpentine— Used to dilute lacquer for hardening soft colored surfaces
Conditions
temperature — 20–24°C
humidity — 80% relative humidity
cure time — 24 hours (38 hours for lighter colors or diluted layers)
notes — Curing conditions vary based on the type of lacquer and the stage of the process.
The method
Section by section.
Each heading links back to the moment in the source video where it begins.
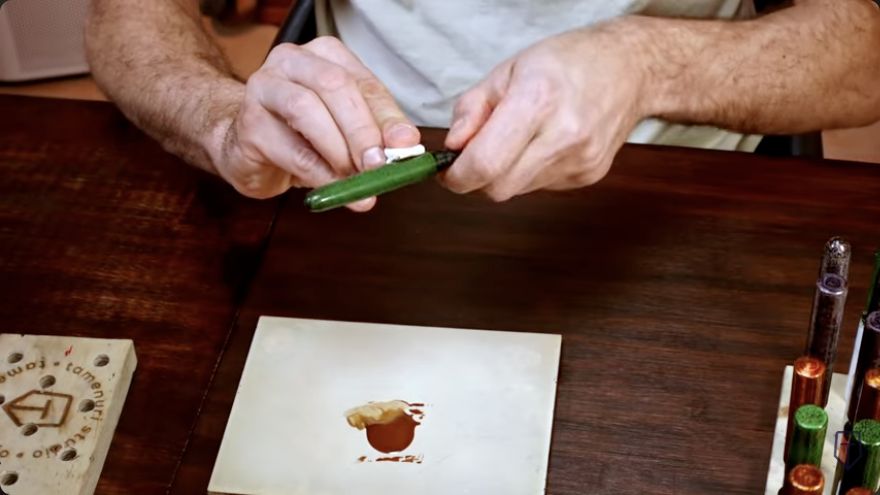
Squeeze a small amount of urushi directly onto pre-cut Yoshino paper to filter it. The quantity is determined by practice; for six pens, a small amount is sufficient. If too much is squeezed out, transfer the excess back to the tube using a clean spatula to avoid contamination. This step ensures the lacquer is free of impurities before application.
When it is rightFiltered lacquer is smooth and free of particles, ready for application.
When it goes wrongContaminated lacquer can introduce impurities into the finish. Recover by re-filtering or discarding the contaminated portion.
Create a tampon-like applicator by filling a lint-free, non-woven cloth with a soft wipe or cotton and securing it with tape. This tool helps control the amount of lacquer applied and ensures even distribution. The maker notes that gloves are rarely used except for fuki-urushi, as they can hinder control and lead to lacquer getting under fingernails.
When it is rightA secure, lint-free applicator that allows precise control over lacquer application.
When it goes wrongA poorly secured applicator may shed lint or lose material. Recover by re-securing the cloth or using a different applicator.
Rub a tiny amount of filtered urushi into the cleaned pen surface. The goal is to fill micro-grooves, pits, and micro-cracks, not to wet the surface. The rubbing motion is crucial for penetration. The layer is extremely thin, almost non-existent. Avoid applying too much, as it will not penetrate properly and may lead to failure.
When it is rightThe surface appears slightly shiny but still rough under magnification, indicating the lacquer has filled the micro-grooves.
When it goes wrongApplying too much lacquer or failing to rub it in can result in a poor finish. Recover by wiping off excess and re-applying a thinner layer.
Use a lint-free wipe to remove the excess urushi, leaving only the lacquer in the grooves and cracks. The goal is to make the layer even thinner. Take care with hard-to-reach areas, using a softer wipe for crevices and around threads. Ensure no lint is left on the surface, as lint is a common enemy in this process.
When it is rightThe surface is smooth and free of lint, with lacquer only in the micro-grooves.
When it goes wrongLeaving lint or excess lacquer can ruin the finish. Recover by carefully wiping again with a clean, lint-free wipe.
Cure the pens at around 80% relative humidity and 20–24°C for approximately 24 hours. For lighter colors or diluted layers, lower the humidity and extend the curing time to 38 hours. The curing time and conditions depend on the type of lacquer, the stage of uwazuri, and the quality of the preceding dozuri stage. Monitor the surface for feedback on the next steps.
When it is rightThe lacquer is fully cured and ready for the next stage of polishing or additional layers.
When it goes wrongInsufficient curing can lead to a soft or tacky surface. Recover by extending the curing time and adjusting humidity.
Terminology in this video
上塗uwazuri
The final coat of lacquer, applied and wiped off to enhance gloss
砥塗dozuri
Sanding and initial polishing to prepare the surface for uwazuri
摺り漆suri-urushi
Rubbed-in lacquer, similar to uwazuri but used for hardening soft surfaces
Left open
What this video does not settle.
The exact quantity of lacquer to use for a specific number of pens is left to the maker's practice and experience.
The specific feedback from the surface during curing that indicates the next steps is not detailed.